
A is for Achoo! (A Story and a Tissue Box Tutorial)
/Back in October, when I was at the Pacific International Quilt Festival, I bought MORE of Heather Ross's delicious Briar Rose prints.
I know.
Did I really need more? Well, duh! YES I needed more! You always need more!
As it turned out, that extra yardage was the cloth that broke the camel's back. And by camel I mean the crappy Ikea cabinet where I store my fabric. My shoe-box-sized fabric closet could simply not hold another chunk of fabric, beautiful as it may be.
I was faced with an age-old problem: Where to PUT all the fabric?! So, big surprise here, I decided to make a storage satchel that was eye-pleasing enough to be left out on a shelf.
As far as the rick rack goes... I thought... "Oh, go on, Ashley, why not?"
Then I really liked how it turned out:

And that was when I decided to put rick rack on EVERYTHING.
Sooooo...
'Tis the season to be sniffly, am I right? And that tissue box is kind of an eye sore. Why not add a little sass to that box o' pañuelos, your most commonly used household item?
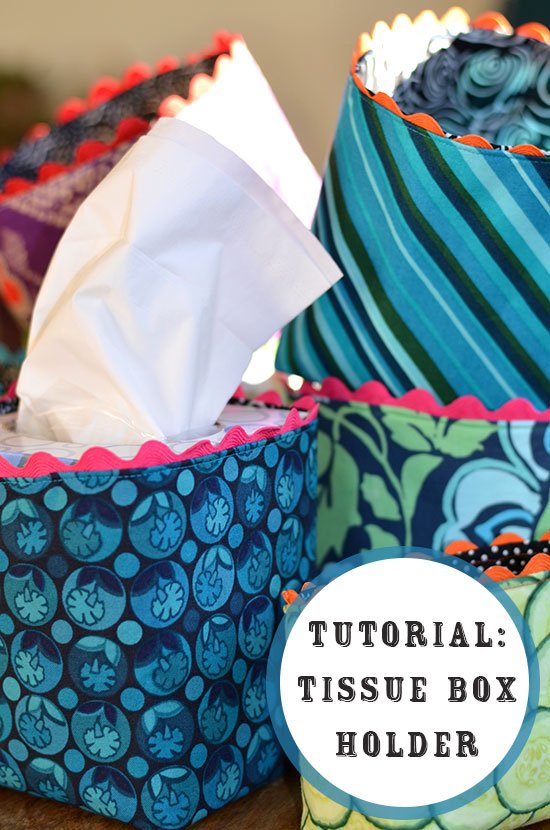
Tutorial: DIY Beauteous Tissue Box Holder
*For a standard size cube tissue box
Materials:
- One 19” x 8” rectangle of fabric for exterior.
- One 19" x 8" rectangle of fabric for liner
- Two 19” x 8” rectangles of thick fusible interfacing (I used Pellon Craft-Fuse)
- 20” of Rick Rack
- Thread
- Pins
- Awesome music
Written instructions following the photos!


Instructions:
1. Iron-on interfacing to the back of both rectangles of fabric following the manufacturer's instructions.
2. Take one rectangle and fold in half, “good” side in.
3. Sew two seams (1/4" seam allowance); one on the side and one on the bottom, leaving the top open. (Note: Top and bottom edges are longer, 9”)
4. Repeat for the liner rectangle.
5. Box the corners using the actual tissue box and a pencil to mark where you will sew.
6. Sew 1/4" outside the pencil line. Trim the extra fabric as seen in photo.
7. Turn lining fabric so the “good” side faces out.
8. Insert the lining “box” into exterior “box” so that the “good” sides are facing each other. Be sure to line up the two sewn edges.
9. Place rick rack between the two layers at the top edge, pinning as you go along. Be sure to leave a tiny bit of the rick rack sticking out.
10. Starting about 3 inches from the sewn edge, sew. Be sure to be less than ¼ inch from the edge, leaving about 3 ½- 4 inches open for turning.
11. Turn. It might fight with you, but don’t give up!
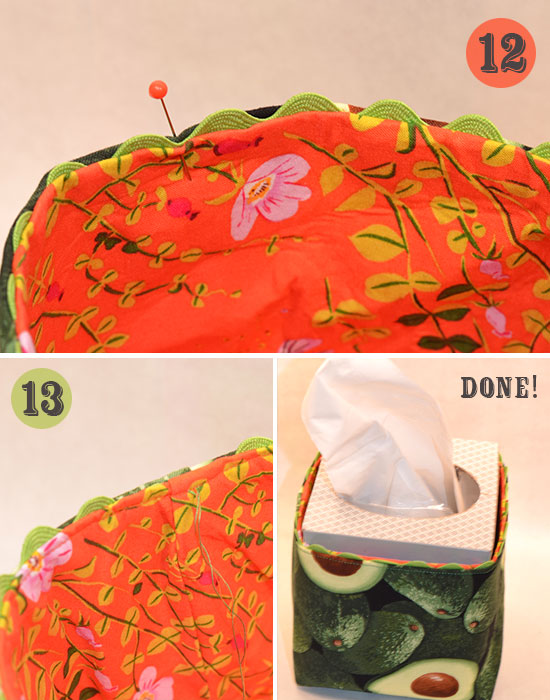
12. Iron the edge flat, particularly where the open part is. Pin this area closed. This might take some finesse, but it should blend in nicely.
13. Sew a finishing stitch along the edge.
14. Tie-off the loose threads.
Boom. Stylish sniffles. Enjoy!

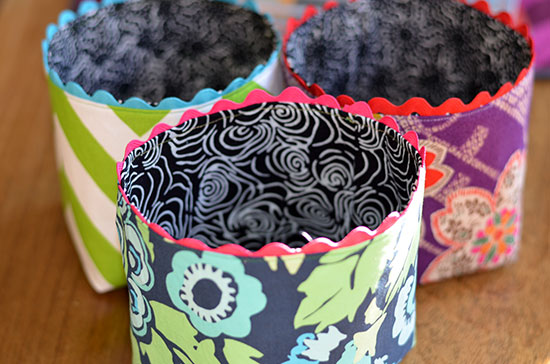

 You'll notice all different shapes and sizes, too! They're great for storing loose change, for gathering buttons, or even for collecting rouge threads. Anyone recognize that Amy Butler print?
Oh, and I'm selling these bad boys at the Friends School craft fair this Saturday, December 14th from 10-1 if you'd like to get your hands on one:)