September, Part 2

alpine

Hi everyone! I hope this month is treating you well so far. I spent Labor Day weekend up in the Sierra Nevada mountains, bidding a fond farewell to summer. Fall is definitely in the air now, and I think my number one task right now is getting used to my new routine. And remember when I said this newsletter had two parts? Well, it's true. Lots of fun stuff going on. So I'm back with September, the sequel.

Videos! Pop-opens! Palm trees! Magazines!

1) I have been a part of the Creativebug family for many years now. Sometimes, when we're filming, it's almost like I'm sitting around the fireplace chatting with my pals. Minus the fire. And with bright lights and a camera in my face. But almost. Check out this mini-documentary on CBTV, Creativebug's FREE library of artist biographies, live stream recordings, and other fun glimpses into the lives of the artists.

How I use journals

3.) Speaking of Nicole and Delilah... let's talk about Craftcation 2017! I'm super excited to be teaching again, and look at what an amazing cast of presenters is already on the lineup! General registration opens on October 13th at 9AM PST, so mark your calendars. Click on the photo below for the registration info. If you've ever wanted a vacation, on the beach, with a bunch of awesome crafty people, taking crafty classes and just generally being crafty and awesome... this is your conference. Palm trees! Fish tacos! Glue guns! Need I say more?!Photo courtesy of Dear Handmade Life (me, Amy Tan, Adrienne Wiley, Kiffanie Stahle in our panel on Multiple Income Streams.)

4) Lastly-- phew!-- Can you believe that people are already thinking about holiday gifts? Yes, it's true. Well I wrote a sweet little tutorial for Modern Patchwork Gifts on how to make a set of these nesting fabric buckets with handles. I also had a revelation last week that they also make great handbags. Get a copy and make some!

mpg16_cover_npc

See you soon!

Ashley

September! Part 1!

paintingcover

September! It’s Fall! Back to School! Virgo birthday season!

It’s also that time again when I announce all the cool stuff going on. There’s so much, actually, that I’m dividing into two posts. Because I like sequels.

1-- I'll be heading to Palm Springs at the beginning of October for Quiltfest Oasis. I'll be teaching and lecturing, alongside some other awesome quilters, including Libs Elliott. Check out the details here or by clicking on the photo. See you in Palm Springs! (I'm so excited, by the way, I've never been to Palm Springs!)

2-- Next up! The following week, I'll be back in the Bay Area teaching for my second year at the Pacific International Quilt Festival. And this time, you'll recognize right away who else is going to be there.

There are still spots open in some of our classes, so head over to the website to sign up. See you in Santa Clara!


Part Two of the September updates to come... including some dates for your calendars and fun projects to announce! Stay tuned.

Oh, and if you aren't already doing so, follow me over on Instagram to keep track of my comings and goings:)

See you soon,

Ashley

Washing Instructions- Hats, Pop-opens, and Sleep Masks

I took several of my handmade products with me backpacking to Emigrant Wilderness a few weeks ago. When you come home from a trip like that, all you really want to do is take a long hot shower and sit down on the most comfortable chair in the world-- which, after sitting on granite for days, is any chair, by the way. Then you look over at your backpack, which you can smell from across the room, and contemplate how long you can put off the task of washing its ENTIRE contents.

But don't feel too sorry for me:

SunhatEmigrant
SunhatEmigrant

There's my reversible sun hat! In the wild! It was the perfect hat to bring because it had a large brim, and was lightweight and highly packable. But man, did it get dirty! I'm talking sunscreen-sweat-bug spray-dirt-dirty. Washing it an alpine lake is a fantastic option for cleaning out in the woods... but back in San Francisco, I wanted to get everything CLEAN-clean. Which, by that I mean actually using soap.

So I'm taking the opportunity to share some important washing instructions for a few of the products I make.

Photo by Isabel French.

1.) Pop-opens:

This felt like a good opportunity to make a really grainy GIF. Please enjoy!

Basic instructions: Hand wash exterior, sponge wash interior.

Detailed instructions: Pull the interior out of the bag. Using lukewarm soapy water (I use a clean and free detergent), hand wash the exterior. You can soak it up to the zipper, just avoid soaking the interior. Then, take a sponge and wipe down the interior. Hang to dry or rest on a drying rack. Just 'pop' the inside back in once dry!

This is where I'll point out that people DO wash laminated cotton in the washing machine, and have no problems. It's up to you, in the end. :)

2.) Reversible Sun Hat:

Basic instructions: Machine wash, hang dry.

Detailed instructions: Machine wash with cold water in a regular load of laundry. To dry, I used a vase to prop the hat up so it dries in its original shape, but this is not necessary.

3.) Sleep mask:

Basic instructions: Hand wash, dry flat. That's it!

--

All of these items came in handy on my backpacking trip, by the way. Some things that I'd add to my list of handmade items to bring for next time: A variety of bandanas (for ascot purposes) and several small drawstring bags for separating and sorting items inside backpack.

All in all, 31 miles, four days, one blister, and a lot of dirt. But worth every bug bite.

Love,
Ashley

Homage to the Pioneer Women

One of the things that I love about quilting is the mixture between the precise and the improvised. There’s nothing that gives me more satisfaction than when my corners nestle perfectly when I’m chain-piecing a quilt top together, but I also rebel against repetitive quilt blocks. I suppose that is one reason why I would be considered a “modern” quilter.

But it turns out my “classical training” has influenced my designs a bit more than I thought.

I wrote a blog post a year ago about a quilt I made for a dear friend who was moving in which I used the friendship star block. I just love how the shape of the star reminds me of a person walking forward with their head held high in a posture of self-assuredness. So this year, when my friend Annabel asked me to make a quilt using her stunning new fabric line for Windham, Maribel, the confident friendship star automatically popped into my head. It seems I just can’t shake this wonderful block.

Well what do you know... upon further research, I discovered that this was a favorite quilt among Pioneer women who made their journeys West.

Allow me to quote from the National Park Service website:

“The quilts the homesteaders brought with them were a comfort to these women who traded their home, family and friends in the East, for the uncertainty of traveling through vast prairies in the West. A quilt that held special value to the pioneer women was the Friendship Quilt.

Often it was done is secret, and then given to the woman as a going away gift. It usually was a group effort, with each block being sewn by a friend or relative with their name embroidered in the center. Putting a Friendship quilt on the bed, gave a woman a sense of connection with her former way of life. It kept alive the memory of family and friends, providing comfort and company during the difficult days of homesteading.

One woman homesteader said, "When I get lonely, I read the names on my quilt. "It was like putting her arms around someone and giving them a hug.”

Aw shoot, as a woman who herself journeyed from East to West… it’s NO WONDER I feel an affinity for this block! Not only does the star represent a strong, independent friend, but it evokes a warm embrace from said friend, and others. It's just perfect.

So from my homestead to yours, here’s my quilt, “Maribel’s Friends,” a variation on the block that is a simple combination between the half-square triangle and the simple square, chain-pieced together. Of course, the only things missing are the names of Maribel’s friends embroidered in the center:)

I'm so grateful to Annabel of Little Pincushion Studio for the opportunity to work with her lovely fabric. Have a peek at the look book here, and ask for Maribel by Annabel Wrigley at your local quilt shop!

Here's another little item I made with Maribel fabrics, modeled here by my friend Anne, who, by the way, is one hell of a quilt-holder-upper. And she also gives really wonderful hugs. :)

Pattern for reversible sun hat found on Creativebug.

Maribel's Friends: Mini Quilt Pattern:

Finished squares measure 3”, finished border measures 1 1/2".

You'll need:

-16 half square triangle blocks (See tutorial below)

-21 squares varying prints from the Maribel collection, cut to 3 ½”

-4 squares of white fabric, cut to 3 ½" for the center of each friendship star

- 2 strips for border, cut to 2" x 40"

Arrange your squares on a design wall or floor, following the photo. Chain-piece your squares together, saving the pressing for the end. (If you are looking for a tutorial on how to chain-piece, might I suggest my class on Creativebug, in which I talk you through the whole process.) Add border strips. Back, baste, quilt, and bind!

Feel free to adjust the size, or add more blocks. Just adopt that Pioneer spirit... sky's the limit!

HST tutorial:

Cut 8 squares to 3 ⅞” (4 colors and 2 low volume white prints, 2 solid white) and follow tutorial to make HSTs. Pair colors with low volume whites or solid whites!

Love,

Ashley

Summer News

Happy Summer!

School is out and the sun is out (occasionally) in San Francisco! There has been a LOT going on over here, so allow me to cut to the chase.

Attention World!

I LIVE STREAMED! Yep, I made my very first infomercial, an impromptu Facebook live video from the Patchwork Show Oakland a couple of weeks ago. Thanks to the team at the Patchwork Show, and also a special thanks to my friends Justin and Jamieson for helping, it was like sweet serendipity the way that whole thing went down.

In case you missed it and need a few chuckles, here it is:

[video width="640" height="640" mp4="http://www.alphabetsummer.com/wp-content/uploads/2016/06/PatchworkLivestreamJune52016.mp4"][/video]


Attention Pop-Open Coveters!

My Etsy shop has a new look. Also, I’m going to be adding this beautiful medium size to my offerings, as well!

BlackYellowPop

Attention Sewists!

My latest post on the Dear Handmade Life blog is a tutorial on how to make this super easy sleep mask. I’m taking mine on an upcoming backpacking trip, since that summer sun makes it almost impossible to sleep past dawn. You should make one, too! 

SleepMask_GIF3_Slower

Awesome photography by Isabel.

Also, my latest Creativebug class, How to Sew a Dopp Bag, is the June Bag of the Month! If you haven’t checked out the trailer to see if it’s your thing-- which I can already tell you it is-- here you go! Don't forget to use the promo code ASHLEY for a free two-week trial!

June_BagOTM_Blog_650x650

Attention Pop-Open Owners!

Are you taking yours on any trips this summer? Take a photo of your pop-open in the wild, like my friend Diali has here in the Grand Tetons! Tag me (@alphabetashley) and use the hashtag #popopensinthewild and it could be shown on my page! Also, at the end of the summer, there might be a prize involved. Just saying.

IMG_9213

Attention Quilters!

I'm excited to be teaching at Quiltfest Oasis in Palm Springs this October 6-8th! I've never been to Palm Springs and I feel like it might officially make me Californian. I can't wait! Head over to the site to see why I'm so honored to be a part of this lineup.

Also in October, I'll be returning to the Pacific International Quilt Festival in Santa Clara! Head over here to see my class offerings and also who else will be teaching... hint: It's my mom!

Attention World, Again!

Last but certainly not least, I’m thrilled to share that an article I wrote will be appearing in issue #30 of Uppercase Magazine! More on that soon, but if you aren’t a subscriber yet, use the code “summer30” for a discount. This magazine is one of my absolute favorites, and I look forward to receiving it more than almost anything. To say I'm honored that words that I wrote will be printed in this beautiful publication is a vast understatement.

That is all, for now. Thank you for reading, and happy summer out there! I'd love to hear from you, especially if you have any ideas for more silly live videos!

More from me really soon.

Love,

Ashley

What's New

Lots of fun stuff happening over here!

First of all, this week is QuiltCon 2016 in Pasadena, CA. I'm thrilled for several reasons, one of them being the cool classes I'm taking, including my first long-arm class! I'm excited to see friends and meet new ones, hopefully. And of course, I can't wait to see the one and only Gwen Marston as the keynote speaker this year. But... it's also the first time I have a quilt hanging in the show! I'm extremely giddy to see "Pixels" hanging on the wall of a show... it will be a special moment for me, for sure. More on this soon!

Secondly, my latest class on Creativebug is out! The Perfectly Pixelated Jelly Roll Quilt is a great beginners quilt top project. It features my favorite chain-piecing technique, and explores how to use a design wall to map out your design. 

If you haven't signed up to Creativebug yet, now's your chance. They're offering a free month subscription if you use the code MSTAR. What are you waiting for? Just head over and check out their instructors and classes if you don't believe me about how amazing it is.

Thirdly, I'm so pumped to be writing a monthly post for the Dear Handmade Life blog. If you're not familiar with this website, it is one of the many glorious brain children of Nicole Stevenson and Delilah Snell, of Craftcation and the Patchwork Shows that I participate in and love. Check out my maker profile and see my first DIY post, this super sweet and simple fabric wallet.

Simple-DIY-Fabric-Wallet-from-Dear-Handmade-Life

And on the personal project side, I can finally share this baby quilt that I made for my dear friend’s new baby boy. I used these delicious constellation and moon phase prints from Moda, and love both the random chaos and occasional order that the half square triangle design created. I have an image of him, as he grows, staring at the triangles and squares and finding new patterns and different shapes each time. 

WillsGalaxyAshleyNickels

I just love this quilt, and I hope he does too.And don't forget, registration for Craftcation is open!

See you soon,

Ashley

Baby Bibs: They're SO In

There are more babies in my life right now than ever before! And that’s saying something, because I remember one year at my school in Spain when so many of my colleagues were pregnant --something in the water, they said-- that when those little guys reached school age, they filled almost an entire preschool class!

Well now it’s January 2016, and it seems the baby-having has ramped up again. I can’t seem to throw a cat without hitting a newborn or a pregnant friend! And the ones that have arrived recently, boy, are they gorgeous little humans.

Who spit up a lot.

And are in need of bibs.

I suppose I’ve been bib-making for many years now. A few years ago, during another baby-having extravaganza at my school-- this time in San Francisco, and this time by the wives of my co-workers, so NOT school water related, thankfully-- I thought of this simple, customizable, and easy-to-make baby gift.

And I’m not kidding when I say they really do make the perfect, easy gift. Using 100% cotton makes them fully washable, totally useable, and extremely soft. If you don’t believe me… try it yourself! By taking my class, Quilted Jelly Roll Baby Bib!

I’m super excited about all of my newest classes on Creativebug, but this one in particular is near and dear to my heart. Not only is it extraordinarily fun because you get to use strips from a jelly roll, but it involves making an improv log cabin block, which means that when you make this little guy, you are officially-- gasp-- a quilter!

I hope you guys will check it out. What’s more, and perhaps the best part of it all… Creativebug is offering the first month FREE for new members using the discount code MSTAR through 3/31/16! So, if you haven’t tried Creativebug yet, this is your chance.

AND! I’m so honored and excited that this class is part of an exclusive offer with Missouri Star, who is offering the Mojito jelly roll (the one I used for this class) as their Daily Deal on Friday, January 15th! By the way, if you don’t know about Missouri Star, check them out here, or read what Abby Glassenberg just wrote about them over here.

Happy baby-having and bib-making, world!

-Ashley

(My thanks to Brené Brown, for reminding me-- while reading her latest book over the holidays-- of the fabulous "cat-throwing" expression.)

Back to School Newsletter

InspireQuote
InspireQuote

I know, I know. Nobody wants the summer to end! Some people are happy to be back at school (or to send their little/not-so-little ones back to school!) and some are perhaps... a touch reluctant that the glorious unscheduled time and freedoms of summertime have come to an end.

Over here in San Francisco, summer endures. As we enter the warmest and sunniest two months of the year in the Bay Area, I'm gearing up to go "back to school" in a sense myself. Next week, I'll be teaching a live (that's right, LIVE) class called "How to Teach a Craft Class" on CreativeLive.

I'm excited about this class for a number of reasons. First of all, I LOVE talking about teaching and all of my experiences over the years of teaching teens, tweens and adults. But I'm pretty sure people don't want to just listen to me ramble off stories about kids hiding under tables or what it's like to take 54 kids to Central America.

So. This class is for anyone who has a craft. This class is for anyone who has ever been told, "Oh, you should TEACH that!" This class is for any artist/crafter/maker who wants to expand their business and add more income. I'm going to show you why you are ALREADY a teacher.

We're going to talk about what's holding you back, and you'll learn the tools and tricks you need to go forth and TEACH. And I promise, it will be FUN. And by the end of it, you'll not only know what to do, but you'll wonder why you weren't doing it already.

RSVP to the course here!

Ashley_Nickels_Facebook_RIght_815x315

Did you know... you can watch the free live stream on September 2nd and 3rd, which includes a live chat forum where you'll be able to ask questions and interact with me in the San Francisco studio. Whaaat?

Are you out there teaching your craft? Are you an aspiring craft teacher? I'm thrilled to invite you to join the Teacher's Lounge, an online meeting point where you'll be able to connect with other crafty/creative teachers and talk shop! Get advice, find potential teaching gigs, exchange resources, and more. Make sure you're signed up for my newsletter to find out more.

I think you'd like:

  • Pam Garrison's Creative Sketchbooking class on Creativebug. Pam gives you the freedom to make mistakes, explore, and have fun using paints, ballpoint pens, collage, and more. I HIGHLY recommend it for a creative jolt! (If you follow my Instagram feed, you'll see it's my own personal obsession right now!)
  • You are a Badass by Jen Sincero. The title speaks for itself, but if you are ever wavering that you are, in fact, a badass, PLEASE read this book.

See to you soon:)

-Ashley

Want to get these newsletters via email? Sign up over here:)

Happy Times- A Patchwork Show Recap

Wow, that was fun.

As a two-time Craftcation attendee and steadfast devotee, I already knew that I loved Nicole and Delilah from Dear Handmade Life, who are the organizers of both events. The atmosphere that these women foster is not only one of immense inspiration and creativity, but it's one that's free of pretense or opulence. So it may not come as a huge surprise that I find myself quite at home around this crowd.

It was a busy day at Jack London Square, full of familiar faces... A friend brought her mother, another brought a group of girlfriends on the ferry, I even saw a fellow quilter who I met in Austin at QuiltCon! And that's just to name a few. It seems like almost all of my dearest peeps made it (if they weren't on their honeymoon!) and OH did they make it special. Flowers, photography, snacks, customer service, manual labor, moral support... It made all the difference.

But ultimately, you know what else made all the difference? My customers. Thank you to all of the people who stopped by, and whether you shopped or not, your feedback and enthusiasm about my bags made it all worth it. Robin the Flight Attendant, you are my hero. Also, I met so many of my amazing fellow vendors, including my neighbors on all sides, and fell in love with a local leather bag maker.

If you did not get a chance to check out my friend and photographer Isabel French's post about my booth, check it out here. And, if you ever have seven spare hours and need to hear someone gush about something they love, just ask me about Craftcation sometime.

Talk to you soon,

-Ashley

Photo courtesy of Isabel French

A Mother's Day Treat

Mother's Day is coming up! You might remember that me and my mom filmed a Mother/Daughter quilting class last year with Creativebug... Well if you haven't checked it out, you can at the very least watch the trailer (complete with eye-roll from yours truly) here.

Also, I thought you might like to know about a NEW Mother's Day offer from Creativebug! Click on the image below if you think your own mom might like a creative jolt for her present this year! TWELVE classes for her to keep FOREVER! The Creativebug library includes some AWESOME classes, and not just quilting! Some of my favorites include this watercolor class, this scarf classthis knit dog sweater class, and this felt sewing kit class. OH! The list goes on. Maybe one of the 12 could be a class featuring a Midwestern mother/daughter combo?

So click on this image to get your mama a sweet creative treat! Enjoy!

Give or Get Creativebug this Mothers Day

And... HAPPY MOTHER'S DAY to all you mothers, grandmothers, great grandmothers, stepmothers, almost mothers, sort of mothers, surrogate mothers, and friend mothers out there!

-Ashley

Photo courtesy of Creativebug.

To Infinity, and Beyond

This must be what it’s like when you come home from Burning Man. I’ve been on an emotional high ever since I came back from my big-fat-love-fest QuiltCon, and for some reason I’ve been thinking a lot about Buzz Lightyear. This feeling of awe and excitement about the world, it reminds me of what children must feel when they are growing up and want to be the President, or win the World Series, or dream of being an astronaut. You feel like anything is possible. Nothing seems out of reach, and why shouldn’t it?

Forget that I’m talking about a quilting conference. What I’m referring to is that universal feeling of purpose, the sense that everything makes sense. That I’m surrounded by my people. That there’s no financial, psychological, or logistical obstacles standing in the way of achieving greatness. That I figured out what I want to do.

Attend conferences, you might ask? Is that what you’ll do now? Gonna keep chasing that high? Cuz that’s not-really-a-job. No, as much as I love spending eight hours a day in dimly lit convention centers, it’s not the actual conference that I want to pursue. It’s what’s within the conference. The community. The spirit. The ART. Someone asked me last week what I want to do in this field, and all I could say was, “I want to do it ALL.” And I’m not even really exaggerating.

Originality, authenticity, tradition. These were all big takeaways for me. Within a community that feels comforting to me because I grew up immersed in it’s warmth, I feel like I’m finding my own place within it. But it will be new, and it might not be what I was expecting. After all, my old pal Buzz keeps telling me not just to go to infinity, but beyond as well.

-Ashley

Need a pick-me-up? Watch Spanish-speaking Buzz again, or for the first time!

Photo: Geometric Rainbow by Nicole Daksiewicz, Chicago IL

A is for Achoo! (A Story and a Tissue Box Tutorial)

Back in October, when I was at the Pacific International Quilt Festival, I bought MORE of Heather Ross's delicious Briar Rose prints.

I know.

Did I really need more? Well, duh! YES I needed more! You always need more!

As it turned out, that extra yardage was the cloth that broke the camel's back. And by camel I mean the crappy Ikea cabinet where I store my fabric.  My shoe-box-sized fabric closet could simply not hold another chunk of fabric, beautiful as it may be.

I was faced with an age-old problem: Where to PUT all the fabric?!  So, big surprise here, I decided to make a storage satchel that was eye-pleasing enough to be left out on a shelf.

As far as the rick rack goes... I thought... "Oh, go on, Ashley, why not?"

Then I really liked how it turned out:

Fab-bag

And that was when I decided to put rick rack on EVERYTHING.

Sooooo...

'Tis the season to be sniffly, am I right? And that tissue box is kind of an eye sore. Why not add a little sass to that box o' pañuelos, your most commonly used household item?

Tutorial-Cover

Tutorial: DIY Beauteous Tissue Box Holder

*For a standard size cube tissue box

Materials:

  • One 19” x 8” rectangle of fabric for exterior.
  • One 19" x 8"  rectangle of fabric for liner
  • Two 19” x 8” rectangles of thick fusible interfacing (I used Pellon Craft-Fuse)
  • 20” of Rick Rack
  • Thread
  • Pins
  • Awesome music

Written instructions following the photos!

Tutorial-1 Tutorial-2 Tutorial-4 Tutorial-5

Instructions:

1. Iron-on interfacing to the back of both rectangles of fabric following the manufacturer's instructions.

2. Take one rectangle and fold in half, “good” side in.

3. Sew two seams (1/4" seam allowance); one on the side and one on the bottom, leaving the top open. (Note: Top and bottom edges are longer, 9”)

4. Repeat for the liner rectangle.

5. Box the corners using the actual tissue box and a pencil to mark where you will sew.

6. Sew 1/4" outside the pencil line. Trim the extra fabric as seen in photo.

7. Turn lining fabric so the “good” side faces out.

8. Insert the lining “box” into exterior “box” so that the “good” sides are facing each other. Be sure to line up the two sewn edges.

9. Place rick rack between the two layers at the top edge, pinning as you go along. Be sure to leave a tiny bit of the rick rack sticking out.

10. Starting about 3 inches from the sewn edge, sew. Be sure to be less than ¼ inch from the edge, leaving about 3 ½- 4 inches open for turning.

11. Turn. It might fight with you, but don’t give up!

12. Iron the edge flat, particularly where the open part is. Pin this area closed. This might take some finesse, but it should blend in nicely.

13. Sew a finishing stitch along the edge.

14. Tie-off the loose threads.

Boom. Stylish sniffles. Enjoy!

Tissue1 Tissue2 Tissue4Briar-Rose-2 Tissue5You'll notice all different shapes and sizes, too! They're great for storing loose change, for gathering buttons, or even for collecting rouge threads. Anyone recognize that Amy Butler print?

Oh, and I'm selling these bad boys at the Friends School craft fair this Saturday, December 14th from 10-1 if you'd like to get your hands on one:)

T is for Tuesdays

Tuesday-bigTuesdays have a special meaning to me. As I've mentioned before, I used to gather my friends together each week on Tuesday evenings for a crafternoon session. Without fail, we would assemble to talk, sew, draw, cook, or sometimes just go on a rant. These moments were magical for us all, and I believe we took away more than just an unfinished craft project from our Tuesdays.

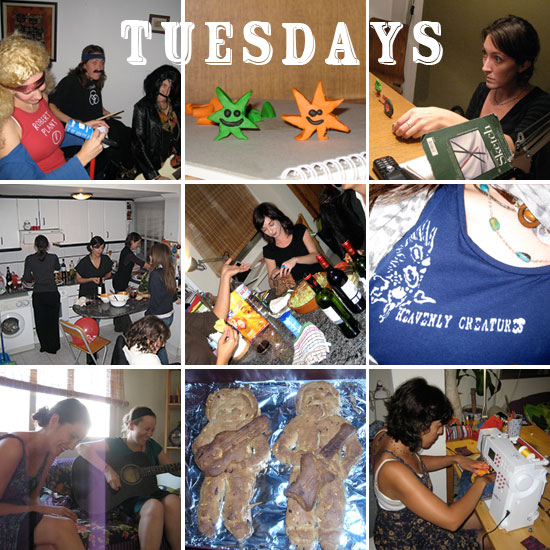
Moments I remember the most from Tuesdays on Calle Columbretes involve green Thai curry, heart-shaped fruit, sewing with not enough light, making up silly songs with the guitar, making Diego-and-Salva-shaped cookies, designing Halloween costumes, printing t-shirts for Emma Get Wild, making Elizabeth’s baby quilt, holiday gift exchanges...

When we all scattered ourselves between the US, the UK and Spain, a small but significant movement was started among our crafting coven: Save Tuesdays. You'll recognize the card from Susannah in the bottom right corner here that started it all. It began as more of a motto to keep our crafting spirit alive, but we even went as far as starting a blog in order to share these crafting moments with each other. Isabel wrote the tagline on the blog, which I love:

“Tuesdays were a good excuse to get together and ease the stresses of the week with talk, wine, music and all kinds of arts and crafts. Sometimes the talking and drinking would get in the way and the only thing we'd actually produce is a slight hangover. Those evenings are missed as we are now sprinkled about the planet. This blog is an attempt to recreate those Tuesday  nights, each with a glass of wine in hand, online possibly, while still ranting and crafting!”

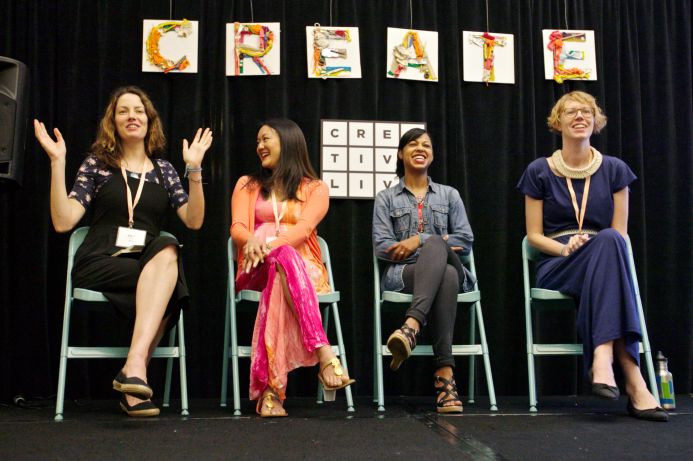
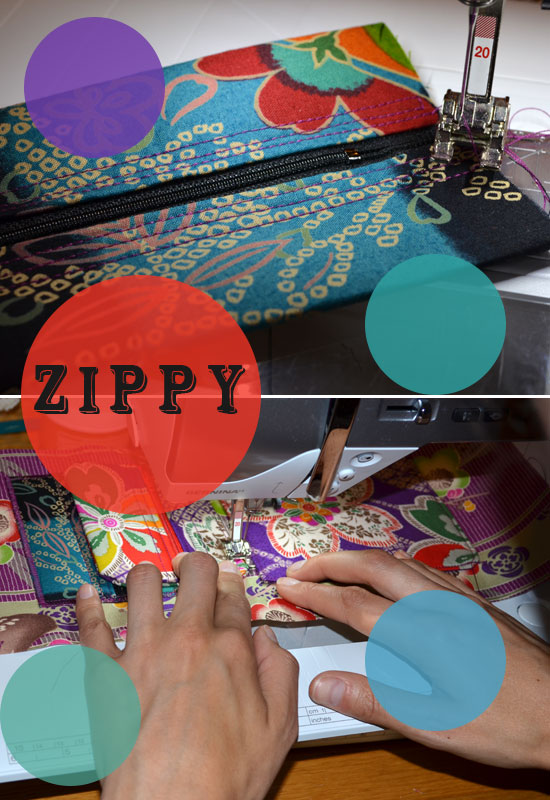
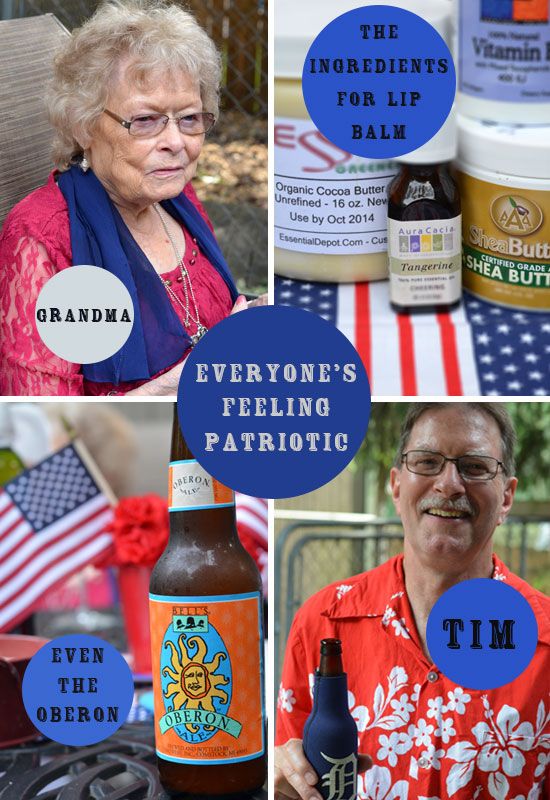
Here’s a few photo collages from the archives, with a few moments from those Tuesdays. Thanks to you lovely ladies for your trust. Oh, how I miss you. *I'm sorry about the Led Zeppelin Halloween picture, it's not from a Tuesday, but I just had to do it. Good Times.

1-Columbretes-Block 2-Tuesdays-2-Spain

And why Tuesdays, you might ask?

In my opinion, it’s the perfect day for a creative gathering. Weekends are tricky to manage consistently with everyone’s booming lives. On Mondays people tend (gasp!) to do work, and later in the week you’re up against things like dates, yoga, or other social activities. Plus, in this case we were all teachers, so on Tuesdays we weren’t utterly exhausted from the week quite yet. Tuesdays are... ideal.

Wait. It gets better.

You know what’s funny? My sister just told me her Stitch n' Bitch group meets on Tuesdays. AND, what's even crazier is that the history of Tuesday nights goes all the way back to our childhood. My mom and her Ann Arbor quilting friends would gather on Tuesdays ALSO. Whoa.

We used to simply refer to it as “Quilting.” (Where’s Mom? Oh, she’s at Quilting...) Here’s my mom’s words:

“I was already quilting and it was a really fun and motivating group. We grew to about 20-25 quilters, meeting in homes every week and 34 years later are still meeting once a week. When I first joined it was a great way to get out the house once a week and spend time with adults! I think we all loved being moms but it was nice to have a support group, as we all had kids about the same age. I remember in the early days when someone was having a baby the group would make a baby quilt. I missed out on that because my babies were born before I joined :( Now they are making retirement quilts and so far I haven't qualified for that! It really turned into a friendship and support group. We still quilt, a lot of the group knits, so there will be knitting going on also. We tried to keep it simple to host and try to stick to wine and popcorn...“

After 34 years... still meeting every Tuesday.

Here are a few pictures of their group (thanks for sharing!):

3-Quilting-Tuesday

I also asked my gaggle about Tuesdays, and about what it means to them to be a part of a creative clan:

“Well, when I think of Tuesday evenings I think of inspirational conversation and crafting companionship. I think of a time when ideas that were just a glimmer in one mind being nurtured and taking full flight. I think of feeling confident to take risks. I think of the warm, satisfying glow that comes from simply creating something. And I think of a group of very good friends.” Faiza

“I do attach significance to Tuesdays every week. During term times I do not always necessarily get down to crafting, but I always think of our meetings in that crafting hub in Spain. If I don't craft I usually cook on Tuesdays and think of you all and the happy and superbly creatively affirming time I spent in all your company...” Susannah 

“Siempre me ha gustado crear, desde pequeña. Si hay algo que me gusta, siempre pienso: "eso seguro que puedo hacerlo", y aunque muchas veces el resultado no es el esperado al menos lo intento, y lo paso bien, pensando, imaginando cómo hacerlo, que es una parte importante del proceso creativo. Y lo que más me gusta es la creatividad en equipo, con mi hermana. Nos contamos las ideas y entre las dos las imaginamos y las mejoramos.” Mar 

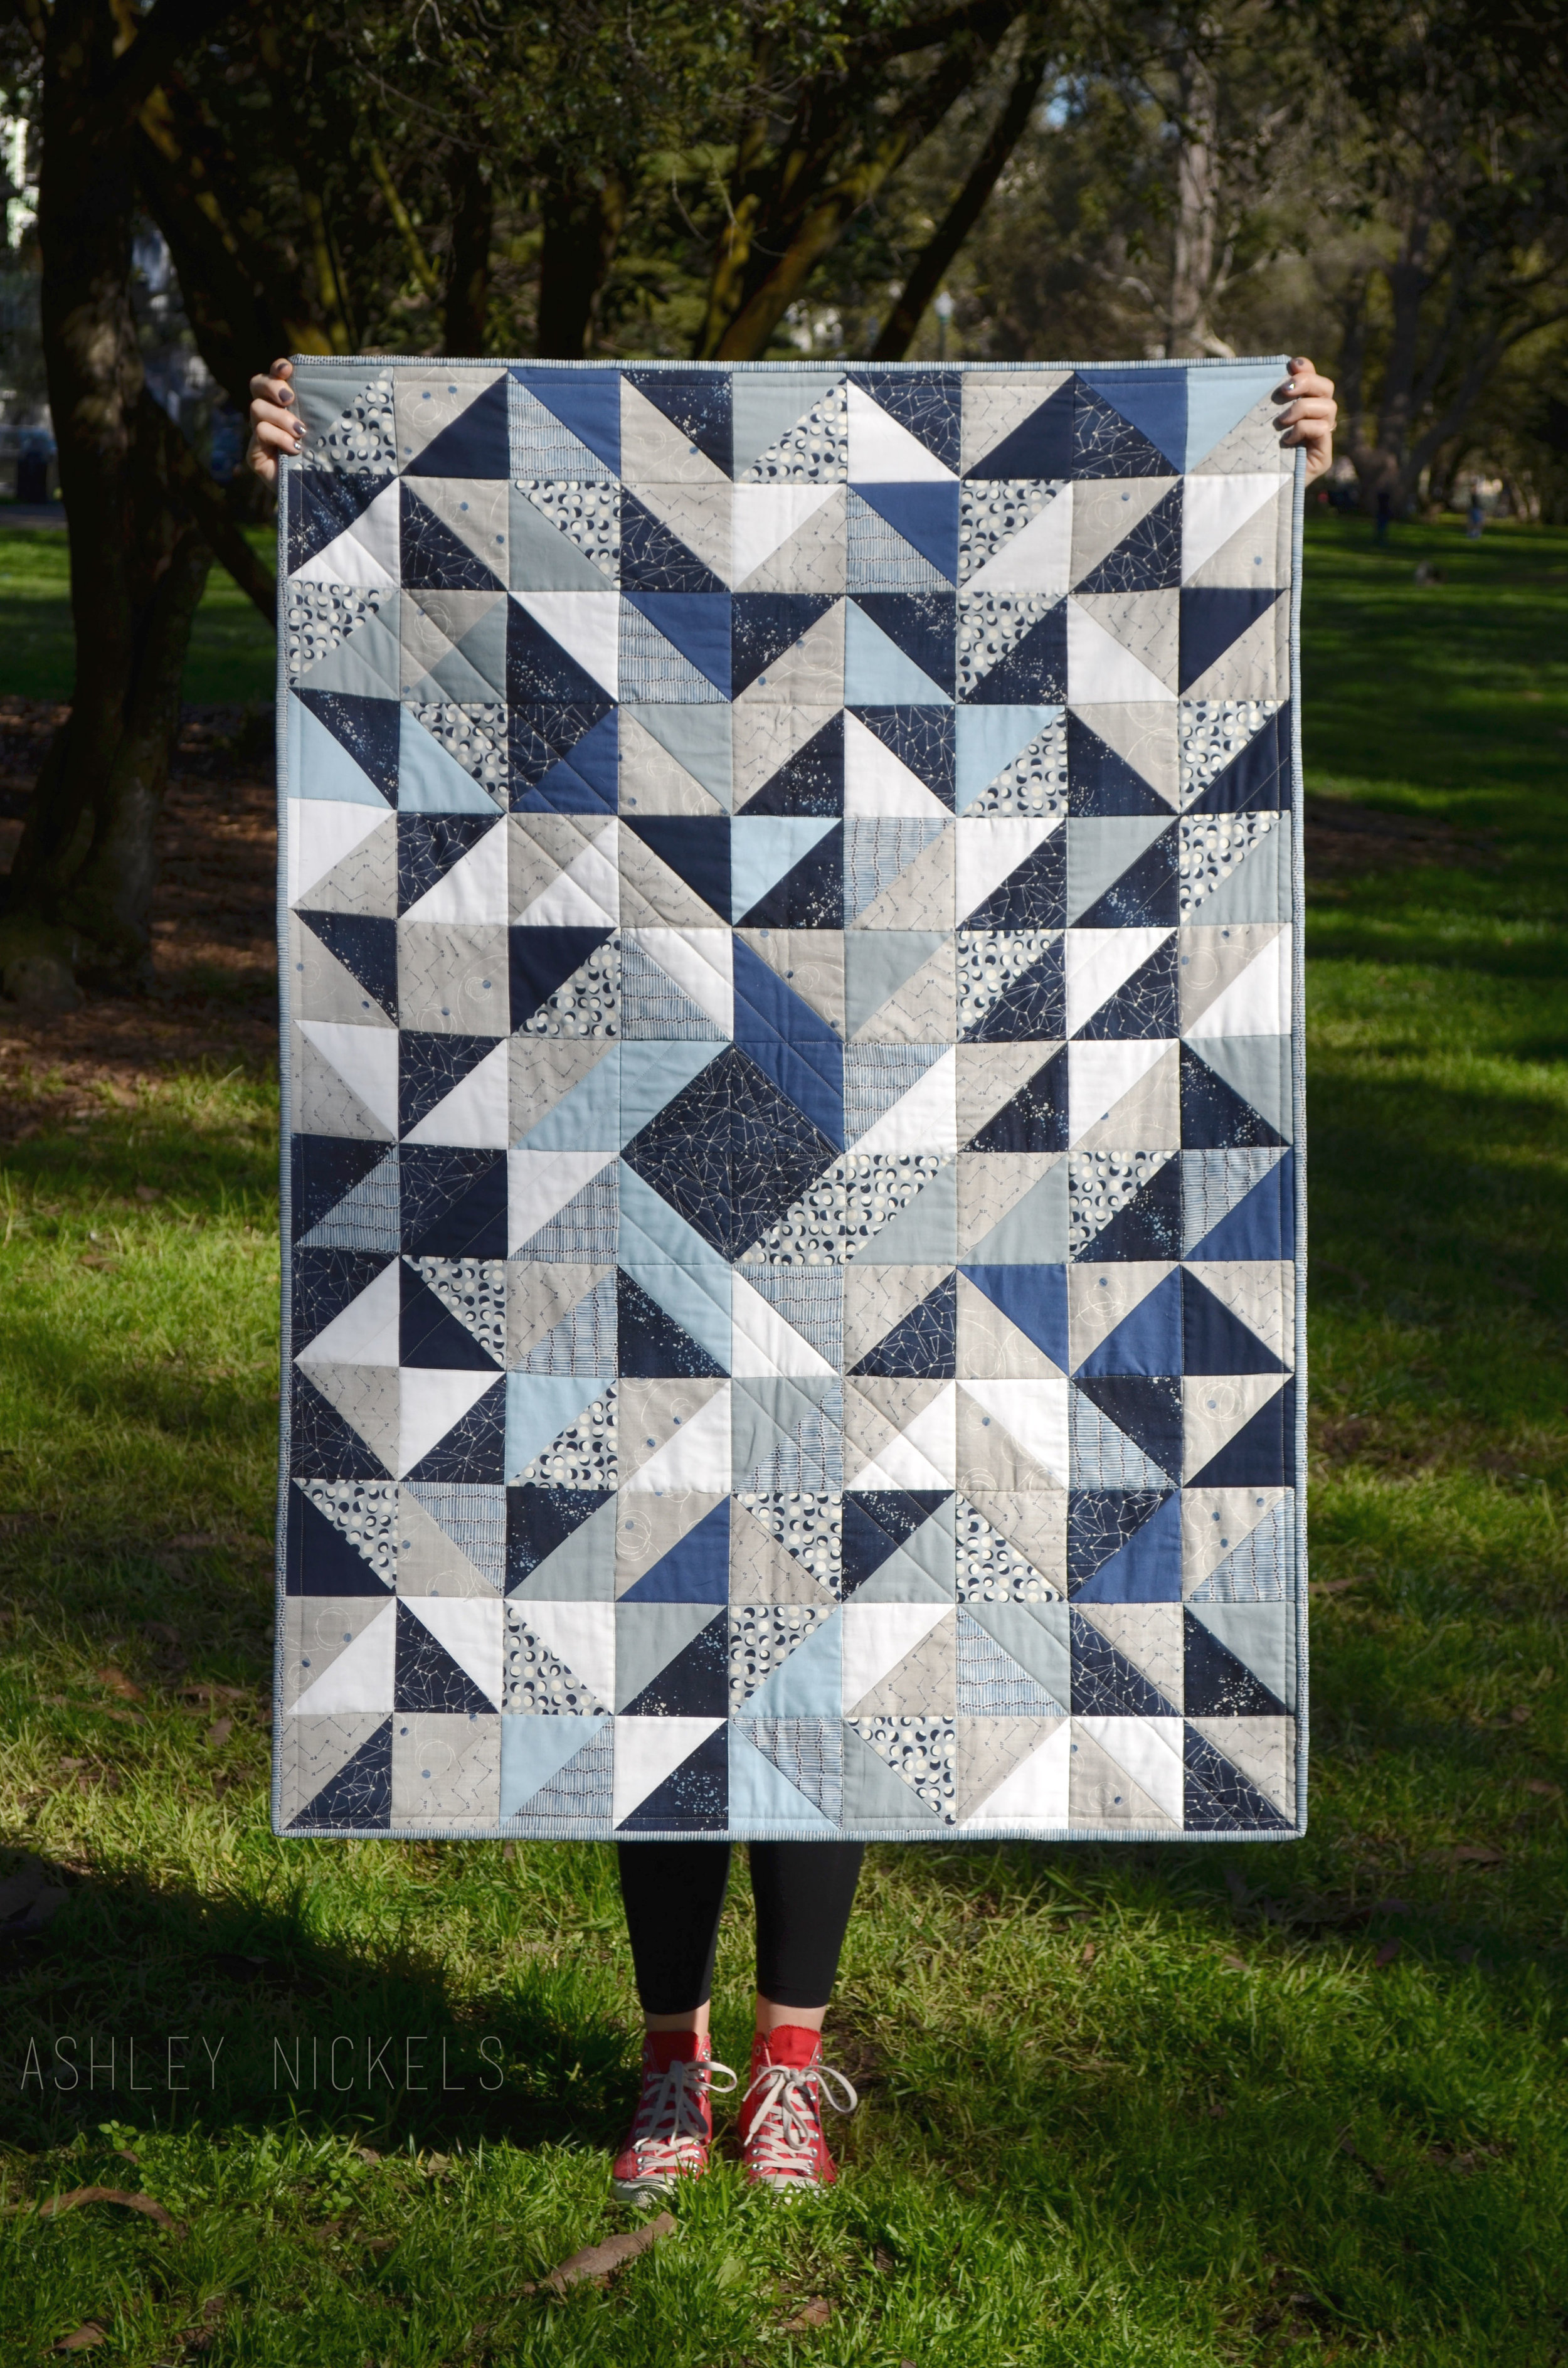
It's some powerful stuff, everybody. We are all still crafting, fueled by that Tuesday energy... Mar and her sister have started a crafty business and, among other things, make some of the cutest crocheted key chains I've ever seen. Check them out here: www.lamardecoses.com. I already talked about Susannah and Lorien, and don't even get me started on how creativity comes in to play when you're a rock star like Isabel. Big project or small creation, we all still thrive on what Faiza beautifully described as that simple, satisfying glow that comes with making things.

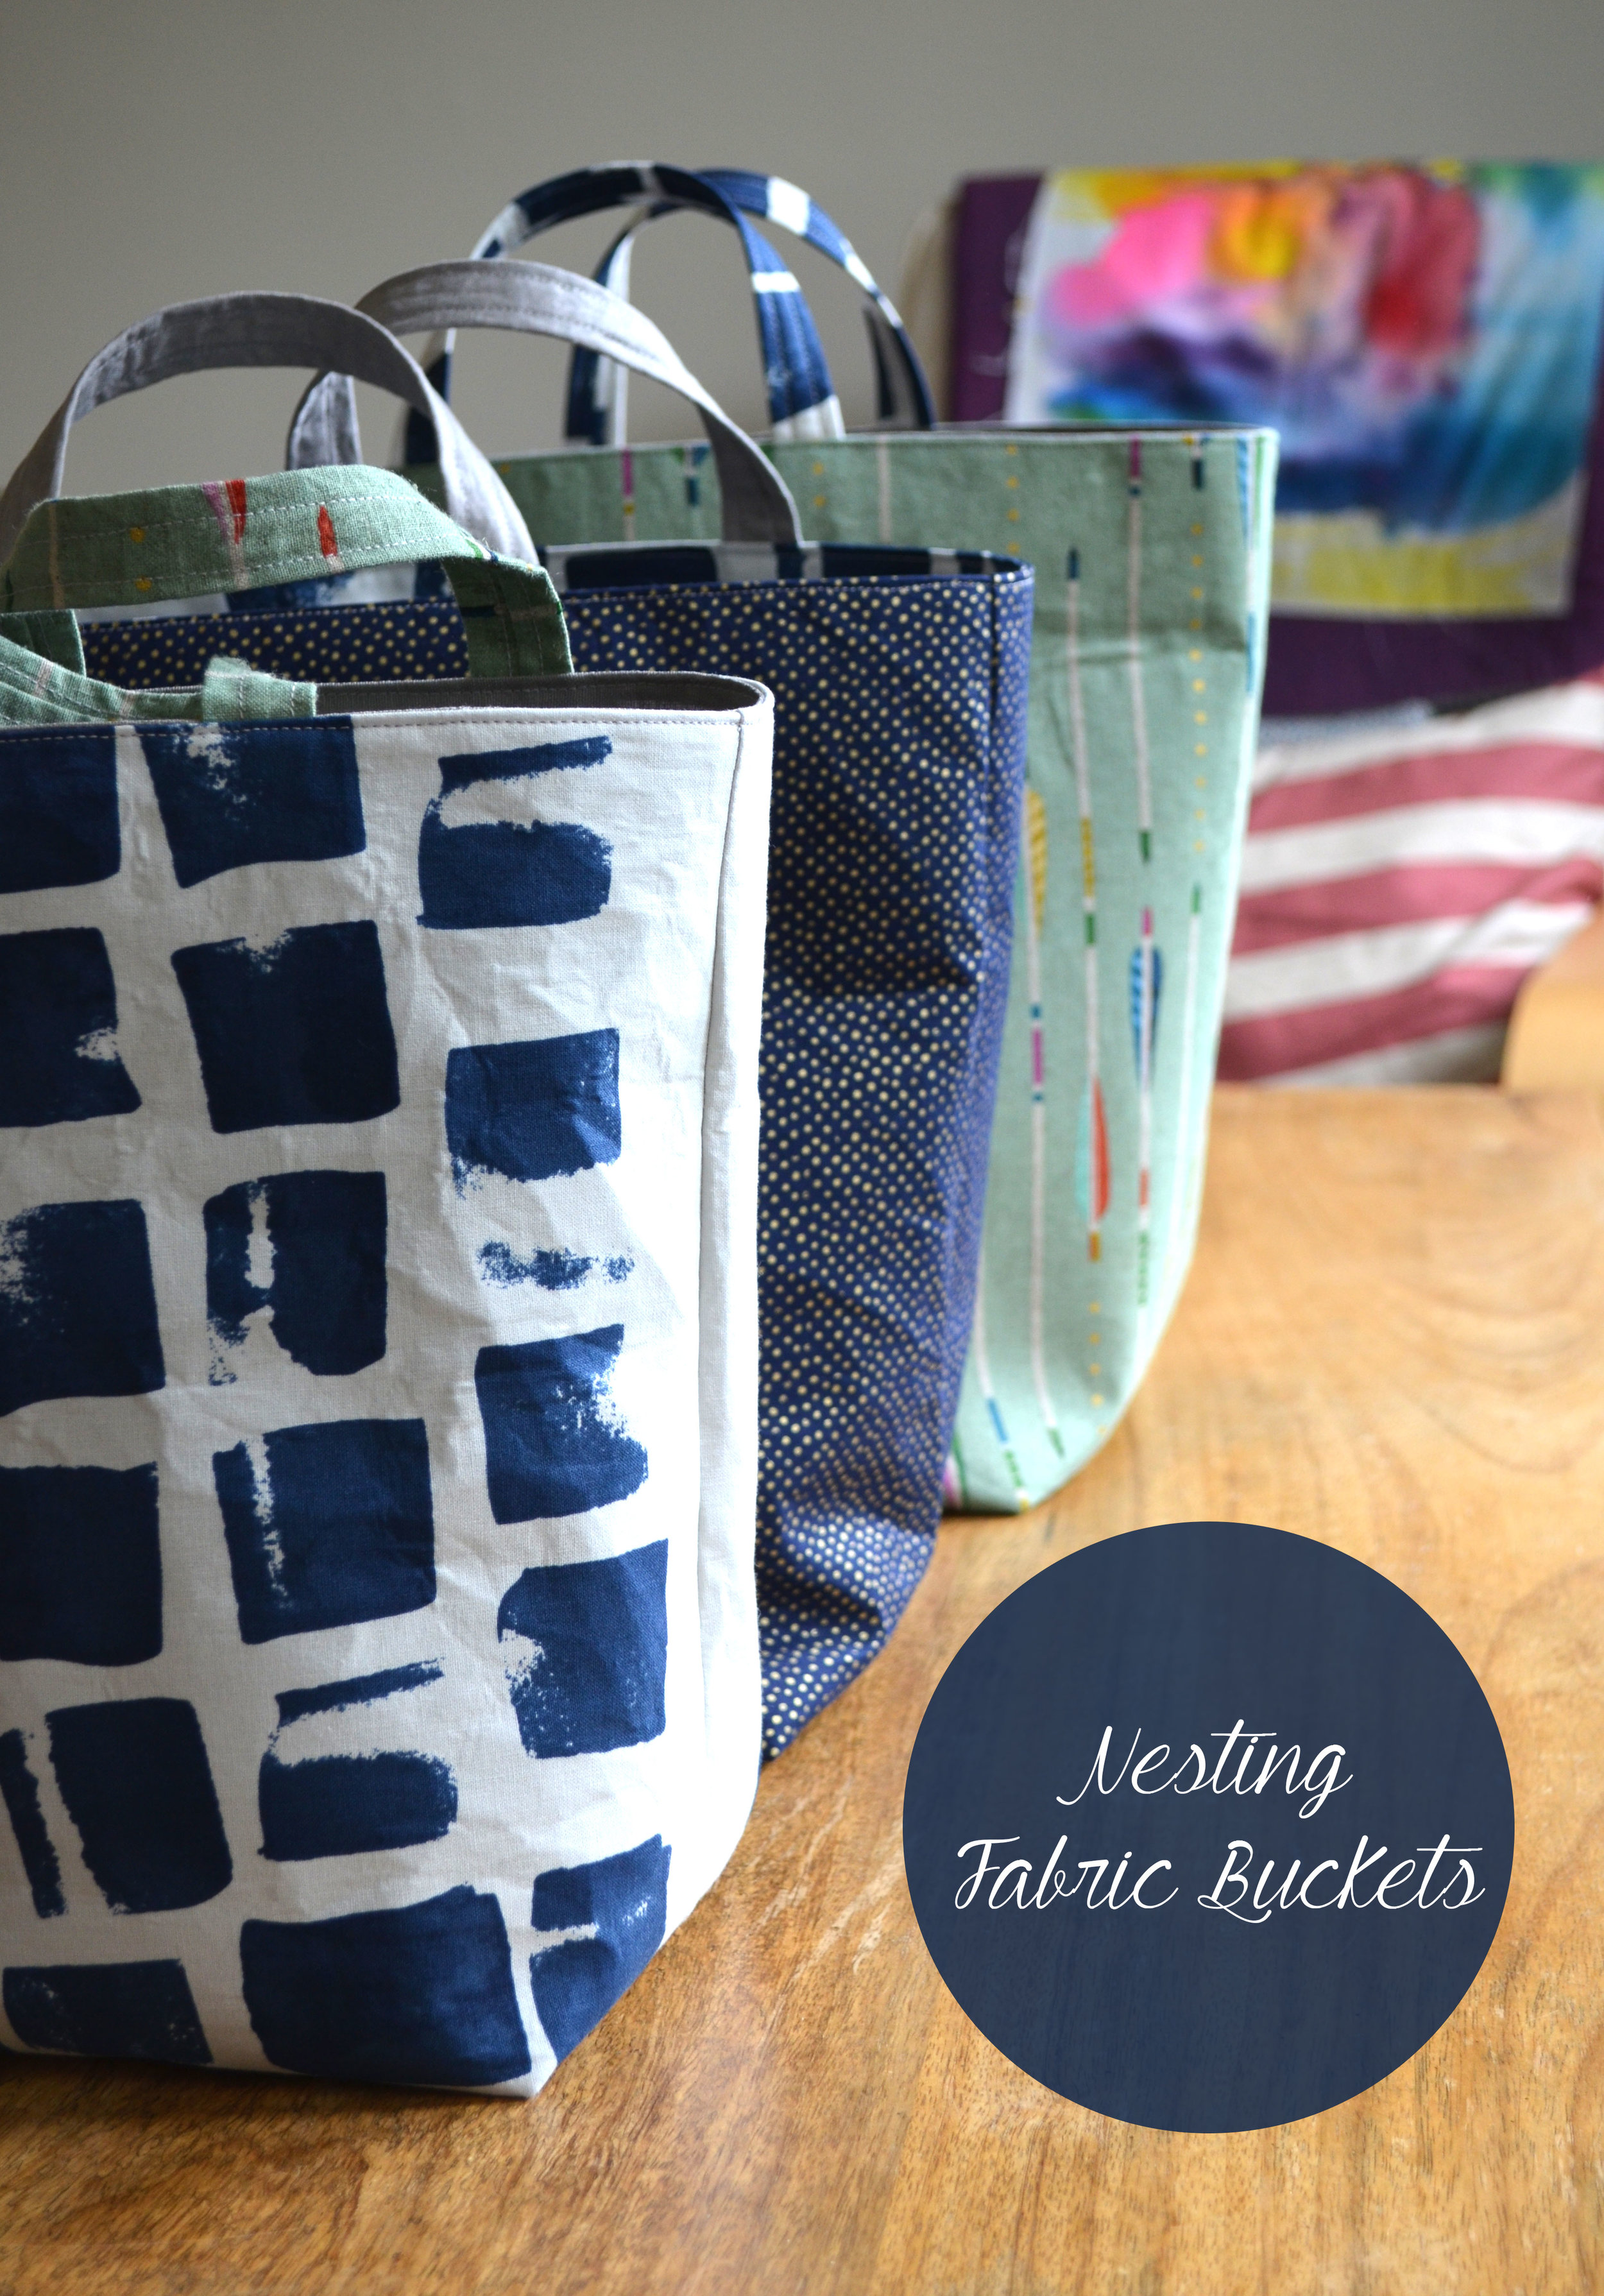
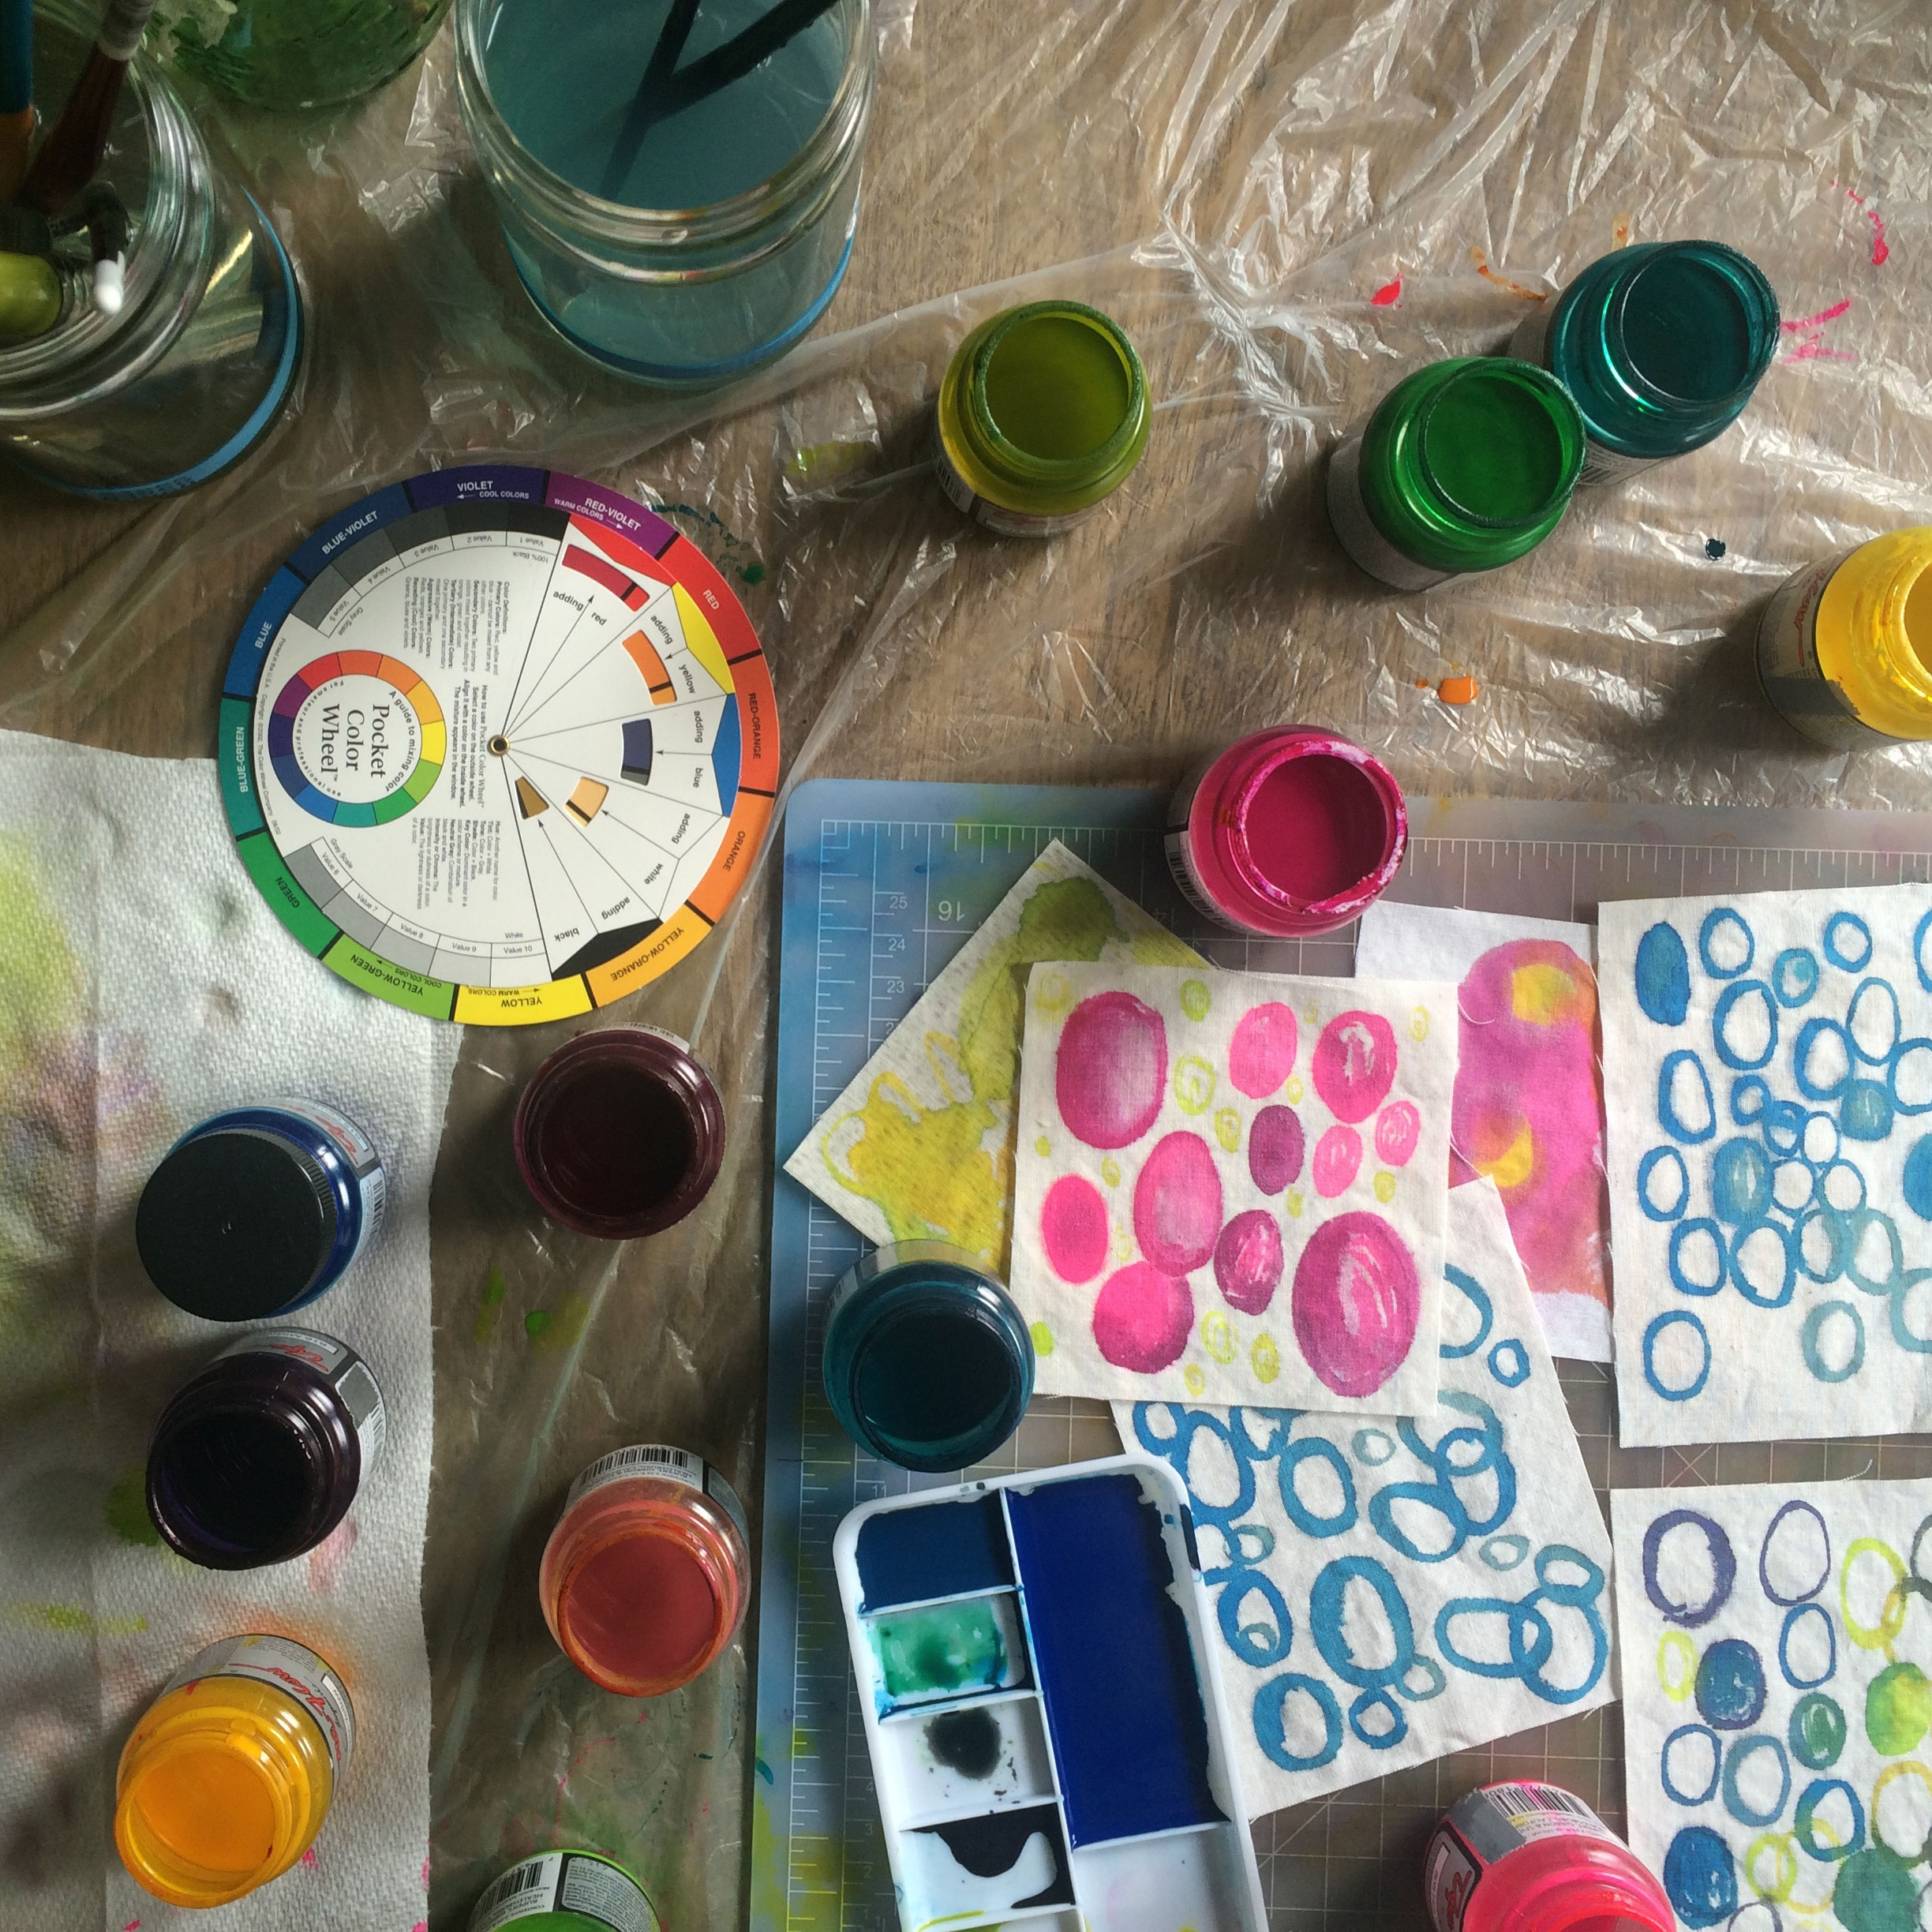
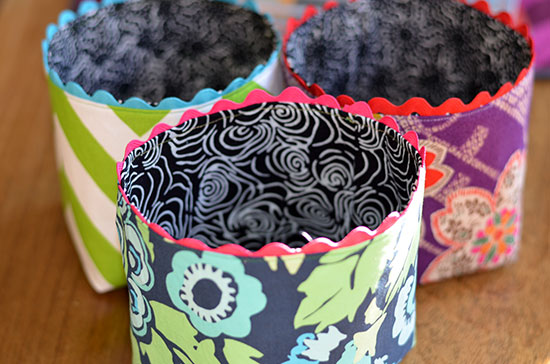
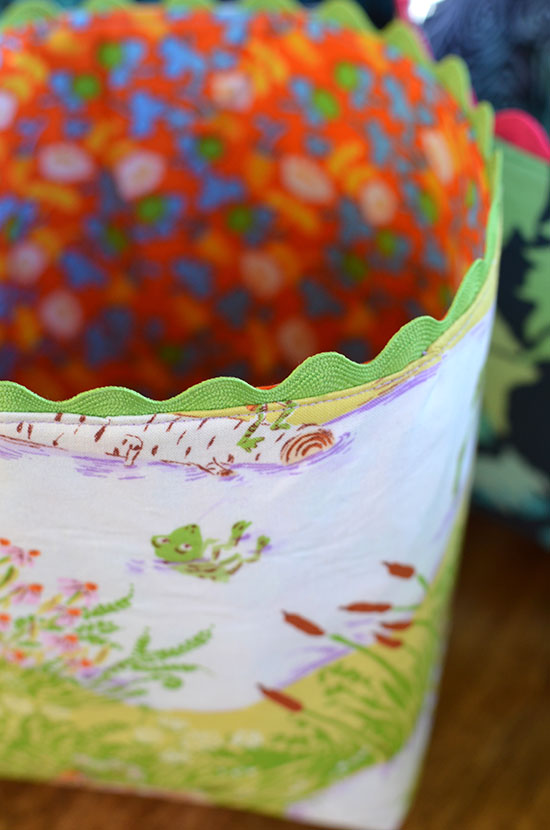
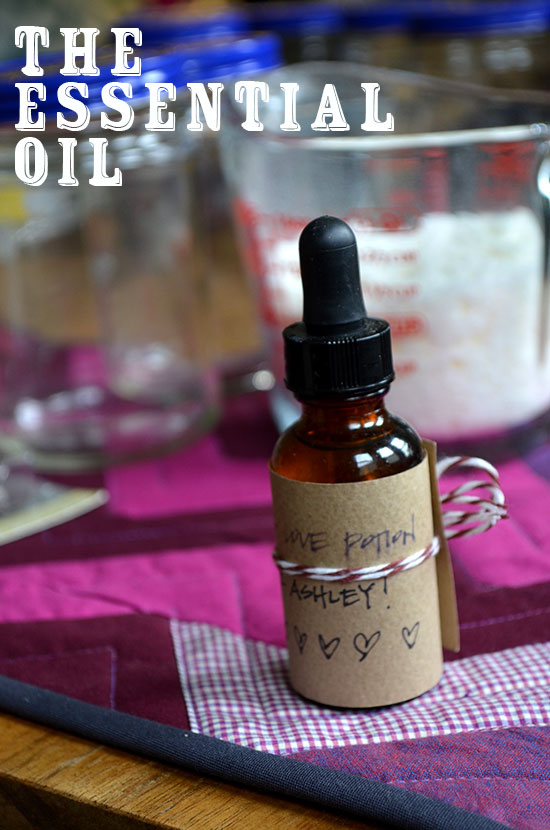
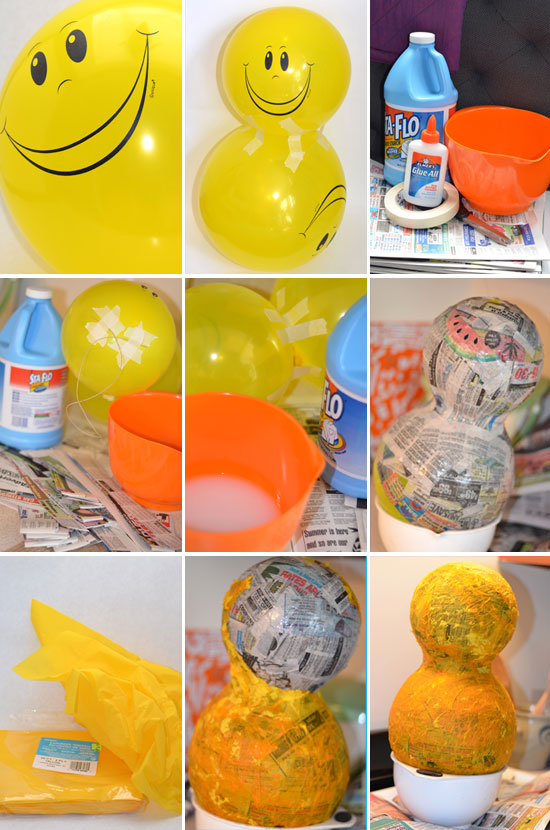
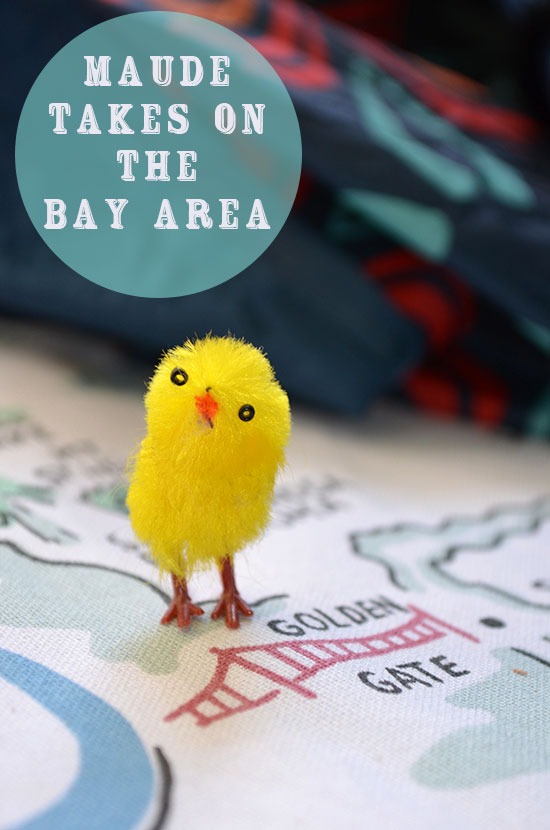
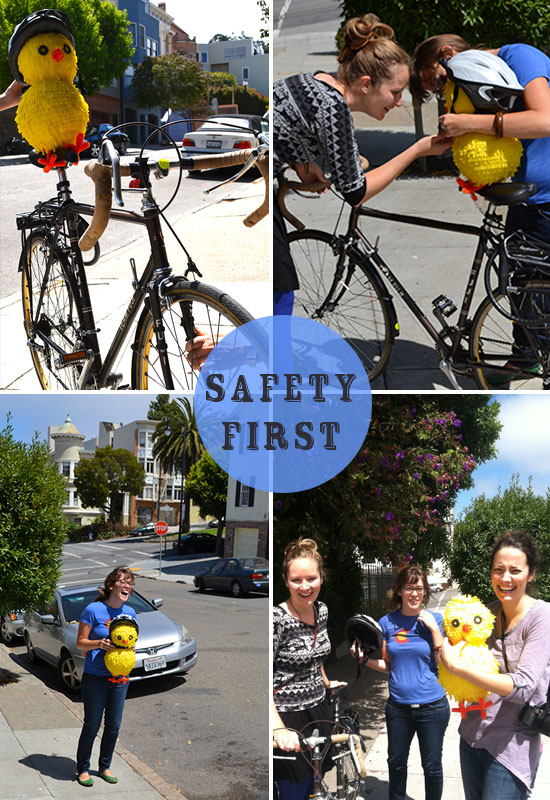
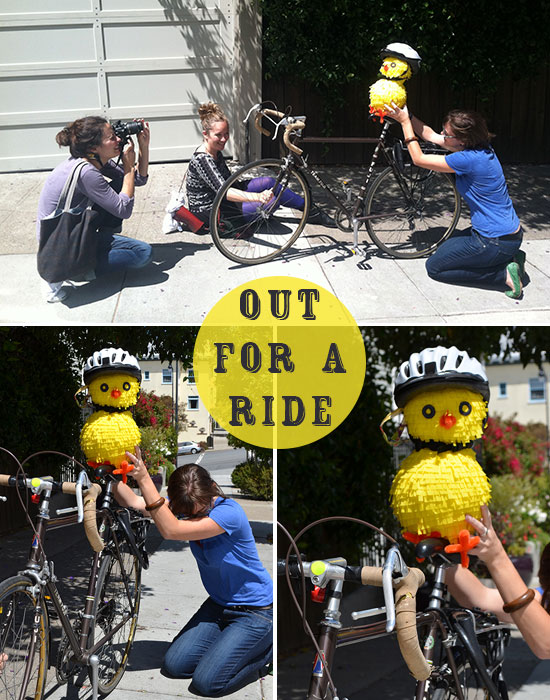
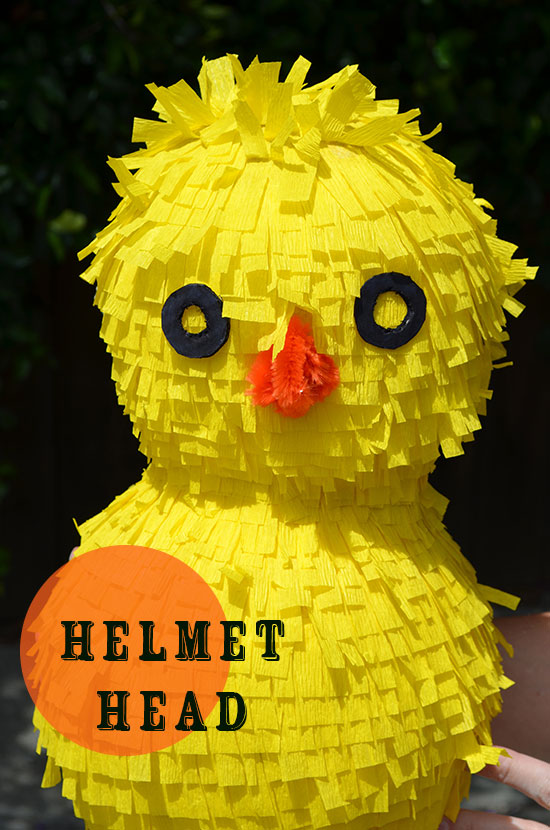
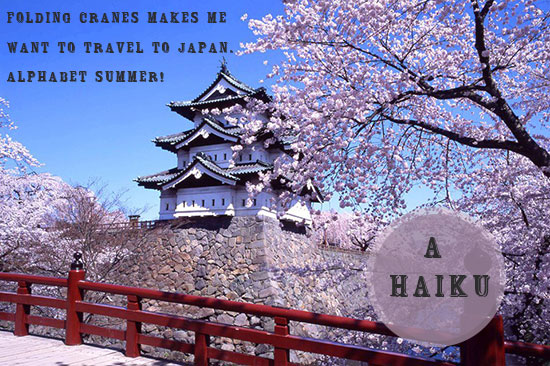
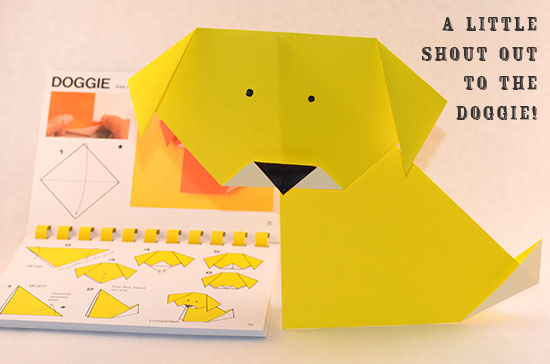
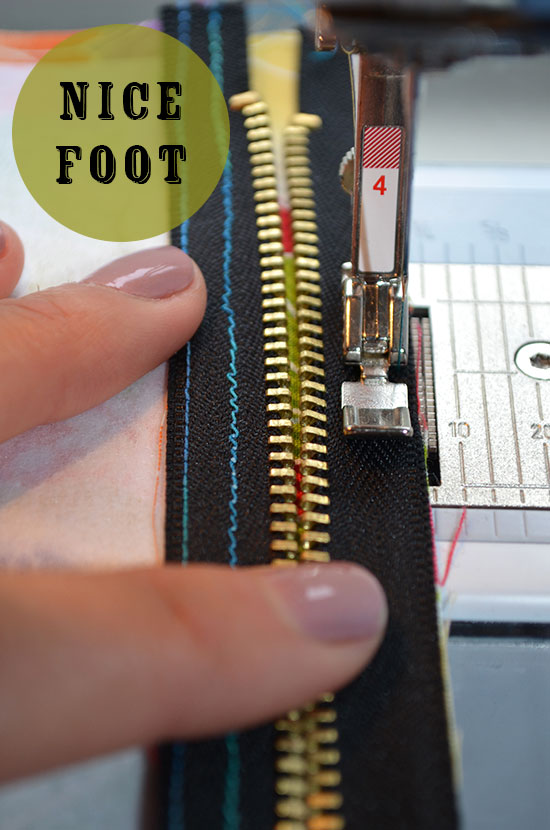
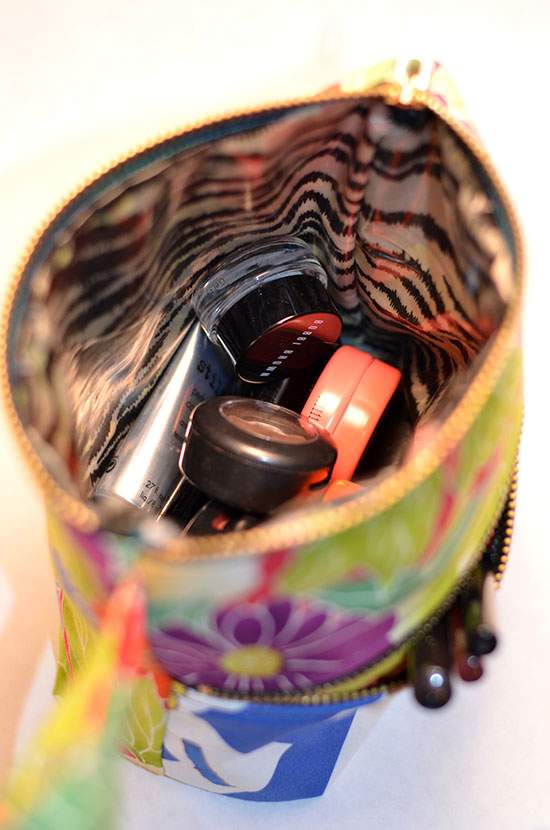
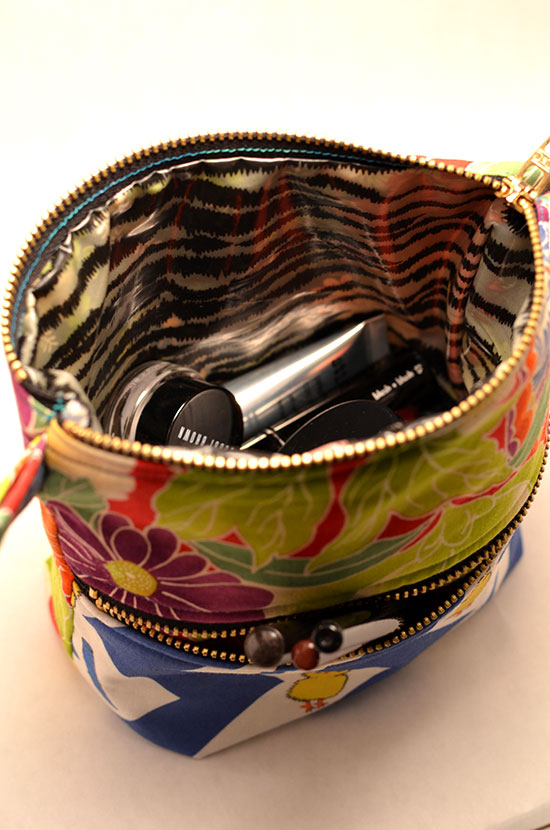
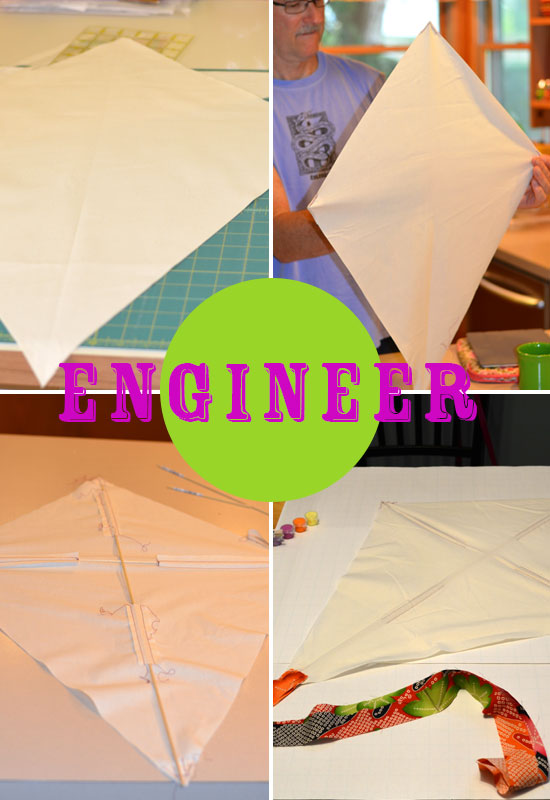
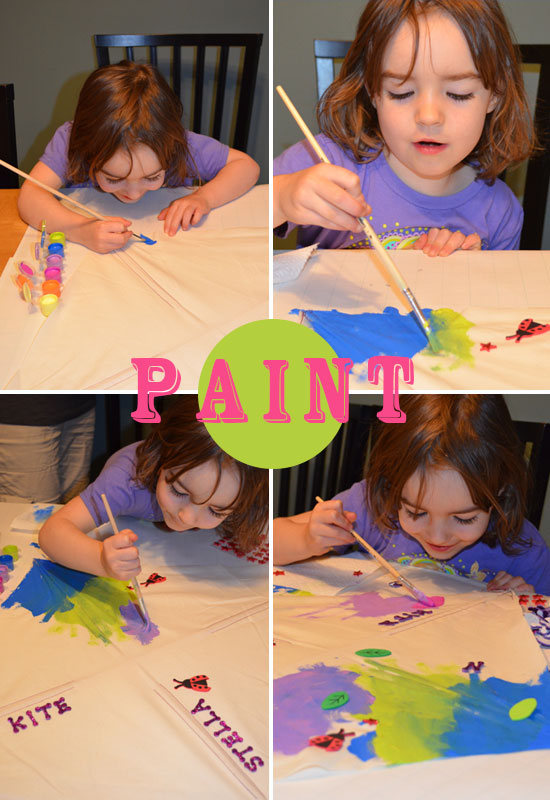
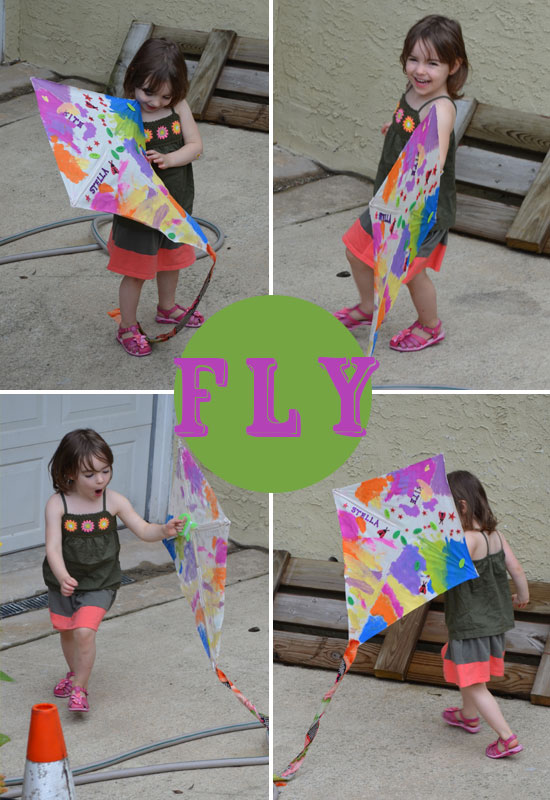
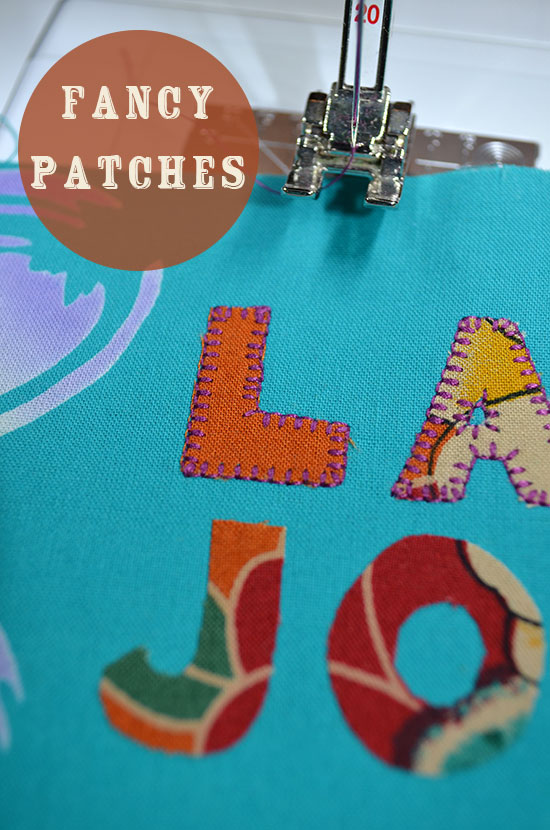
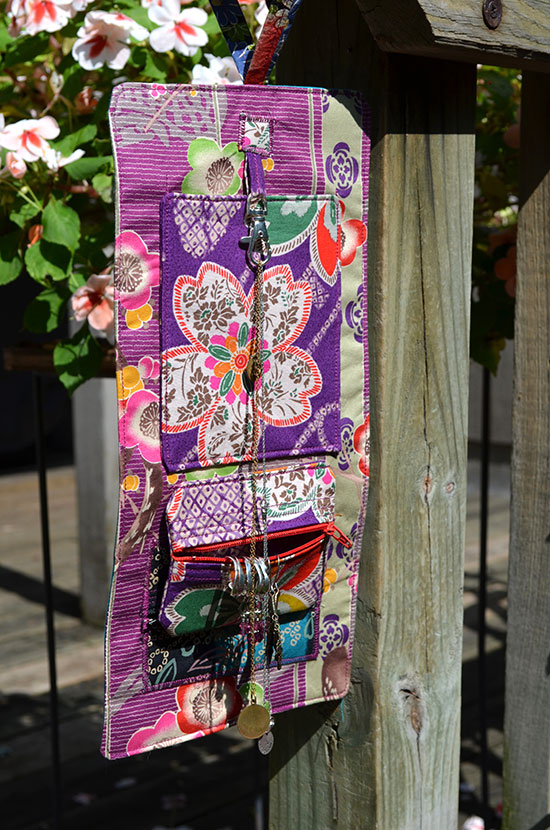
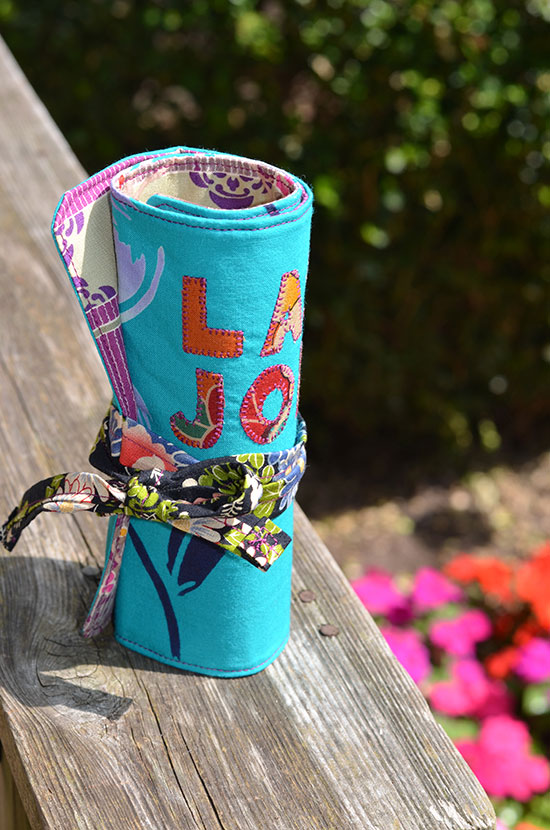
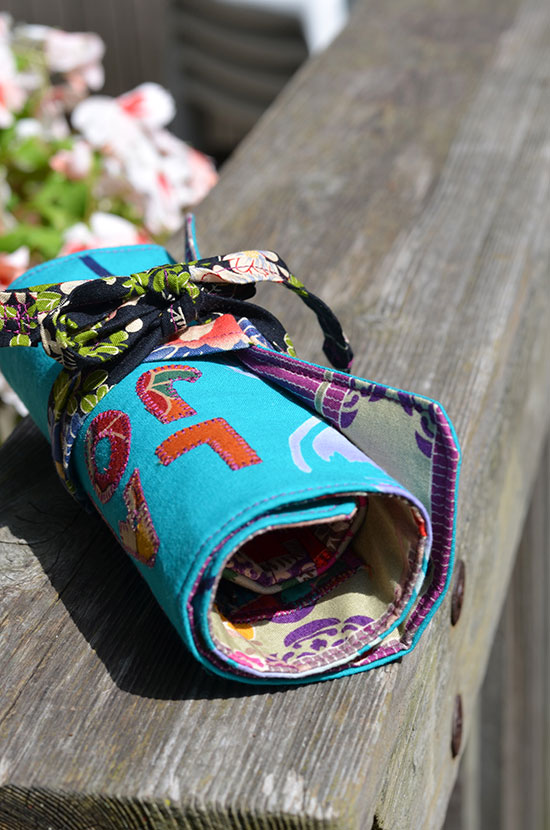
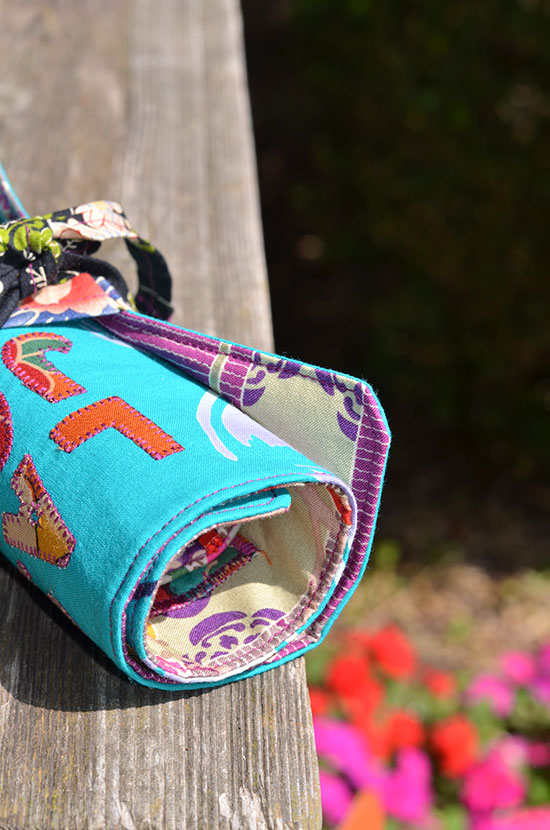
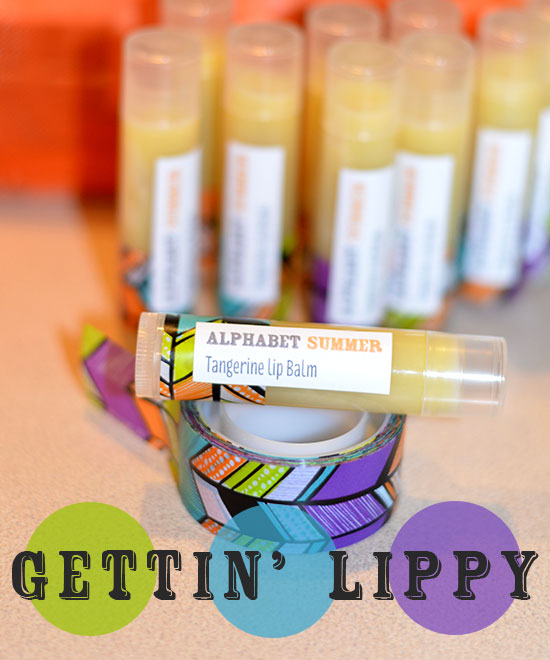
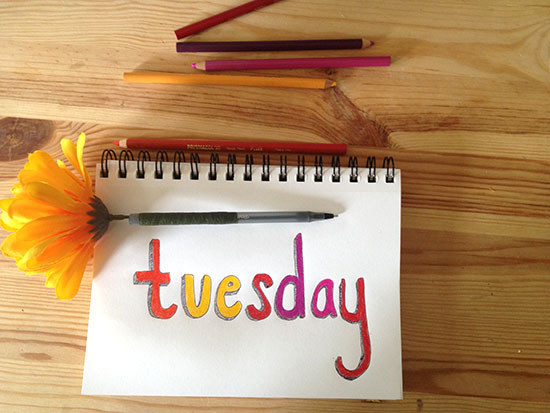
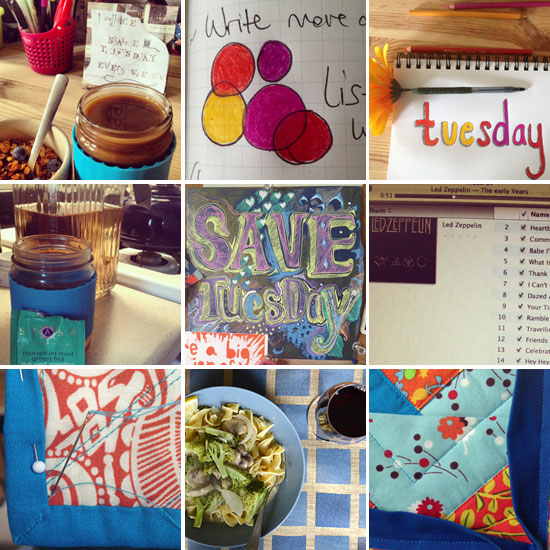
So yesterday, I “Tuesday-ed” it up. ALL DAY. If you follow my Instagram feed, I apologize for all of my #savetuesdays photos, but I feel it necessary to START A REVOLUTION. Here’s a few of the highlights from my Tuesday-athon:

4-Tuesday-Block-o-Pics

What do YOU do to Save Tuesdays? Take a picture of what you make and use the #savetuesdays tag! Are you a part of a Tuesday-style creative group? If you are, I want to hear all about it! If you aren't (yet), do you want to start one?

What's stopping us? WHO IS WITH ME? Let’s do this.

S is for Soy Candles

It's no big secret around here that I love peanut butter.

I'm an equal opportunity PB lover, as well. I will eat it in any form, with any vehicle (a spoon being my preferred), and at any time of day. I'll eat chunky, natural, sugar added, creamy, or (a category created by a friend to describe my favorite kind) grainy. Oh, the grainy peanut butter! I'm particularly drawn to Adams Creamy. And as I was collecting all of my jars, I realize that, wow, I have eaten quite a few spoonfuls.

1 Jars-of-PB-in-a-row 2 Jars-in-a-Row-2 3 Jars-in-a-Row-3

But this post is only partly about peanut butter.

It's also about soy wax and candles! Do you also fall into the "Amateur Pyro/Can't Believe You Haven't Burned Your House Down" category like me? For as many candles as I have burned through in my life, I can't believe I haven't tried this sooner. And since my peanut butter jars were longing to be used for something besides lentils and dried chiles, I decided to listen to my inner pyromaniac. This project was very simple, involving only soy wax, candle wicks and essential oil. I found the wicks at Michaels, and the wax from this sweet little shop in North Beach. I used this tutorial for guidance.

4 The-Lone-Jar 5 Los-Ingredientes 6 Essential-Oil

The only special equipment you need is a double boiler. Funny anecdote: this is called a "baño María" (or a Maria bath) in Spain. That's probably my favorite expression for a household item in Spanish. Check out my DIY Maria bath below:7 Soy-Wax-Melting

I thought one pound of soy wax would make two PB jar candles, but, alas, I was incorrect. So I quickly ran and found this Moroccan tea glass and made a mini-candle. Crafting= thinking on the fly!

And then you wait for it to harden: 8 Drying-Wax 9-Dry-Top-Shot 10-Final-CandleDo you see that strange volcanic eruption that happened? So odd.  I wonder if it's the "tincture" that I used, which may or may not have contained more than just essential oils. Ah, well, you can't win 'em all. Looks like I'll just have to burn it. Shucks.

¡P is for Piñata!

Title-Pinata

In order to get YO’ piñata on, it´s THIS simple:

Making-Pinata-1 Making-Pinata-2 Triple-Maude-Circles

Ahh, San Francisco. The only place where, in July, it’s faster to dry your piñata INSIDE (where the radiator is on, by the way) than it is to leave it outside.

My piñata inspiration comes from these lovely places: Oh Happy Day, and Instructables.

Maude! And, the great news is that we have located an actual living MINI MAUDE. Yes, so now the Maudes (Big and Mini) are commencing their “Summer Adventure Series” in which they travel far (and pretty nearby, actually) in order to pose for some awesome photos... Below you will see the first installment of “Maude Goes Gallivanting.”

MaudeBayArea

Out for a wee bike ride in the Mission! 1 Safety-First2 Out-for-a-Ride-(2)

Oops! Just like everyone in the local coffee shops... Doh!3 Helmet-Head

And if you were wondering, yes, it was actually THAT hilarious.

Gahh! Where will she go next? Stay tuned for updates.

(BIG thanks to my girlfriends on this one, for many reasons, but mostly for putting up with "Maude" and her sassy demands.)

O is for Origami

O-Nine-Square

Origami. From the combination of two Japanese words, Orimeaning fold and Kami, meaning paper.

Folding perfectly square pieces of paper, lining up the edges and corners just so... it’s the perfect meditative activity for when you need to unwind.

And the crane! Oh the crane! The classic origami crane. I love this explanation of its signifigance:

“In Japan, the crane is a mystical creature and is believed to live for a thousand years.  As a result, in the Japanese, Chinese and Korean culture, the crane represents good fortune and longevity. The Japanese refer to the crane as the “bird of happiness”.  The wings of the crane were believed to carry souls up to paradise. Traditionally, it was believed that if one folded 1000 origami cranes, one’s wish would come true.  It has also become a symbol of hope and healing during challenging times.  As a result, it has become popular to fold 1000 cranes (in Japanese, called “senbazuru”)." Source here.

While I didn’t quite reach 1,000... I certainly found hope and comfort in folding these little guys. I highly recommend it if you are in need of a little TLC!

And, as we established back at the letter M, I do love a good theme. So let me start this photo gallery with... a haiku: :)

Japan-HaikuToned-CranesHerding-CranesDoggie-OCrane-in-a-BoxYESString-up-CranesCrane-Cam-GIF

M is for Makeup

Two things.

1. I had two delicious yards of the “Maude the Yogi” fabric waiting for me in the mail when I got back from my Eastern-ly Journey. I didn't think that fabric could be funny, but man, that chicken sure does make me chuckle.

2. Do you know about the Tumblr “Your LL Bean Boyfriend?” I find it quite magnificent, and not just because of the bearded preppy men. My point for bringing it up is this: When asked if the dress she was wearing to an awards ceremony was in fact actually from LL Bean, Liz Price (the mastermind behind the blog) answered, “I’m big on themes.”

I, too, am big on themes. So, while this makeup case may have several commonalities to other things you have already seen this summer (here, here and even here), think of it as an overarching theme (like “Good and Evil” in To Kill a Mockingbird, or “Dependence on Men” in A Streetcar Named Desire.)

The case features some familiar fabric, but it also debuts a new treasure. In looking for a plastic material for the lining of this little guy, I stumbled upon some... ZEBRA PRINT... wait for it... VINYL. Yep, that's right. Zebra print vinyl. Which, of course, not only makes it water/makeup resistant on the inside, but also freaking fabulous.

Enjoy the pics.

Makeup-Bag-Final1-Zipper-Foot2-Zebra7-Vinyl-Zebra-Inside4Inside-Makeup-Full8-Inside-Makeup-Full-25-Front-Zip-Makeup6-Maude-Front-Zip-MakeupWalking-Makeup-GIF

Hey you! This is post #13! Halfway point! Which is to say that Alphabet Summer made it over the hump! Which is your favorite hump video between these two: Camel v. Unicorn ?

K is for Kite

kite, nounˈkīt:

A light frame covered with paper, cloth, or plastic, often provided with a stabilizing tail, and designed to be flown in the air at the end of a long string.

Behold, the visual story of how I went from zero to KITE in a matter of hours... K-for-Kite-Final

Engineer-the-KitePaint-the-KiteFly-the-KiteStella-with-KiteA special thanks to my kite making crew/family members on this one, especially my niece Stella. Go fly a kite, guys!

J is for Jewelry/Japan

It happened again. I went to get a necklace from my travel jewelry case (a.k.a coin purse) only to find the chain in a tangled mess, so entwined with his friend that it appeared they had melted together. While some may say that untangling a pair of knotted silver chains is meditational, I’d rather not spend forty-five minutes of every trip dealing with jewelry! Sheesh.

Japanese-Fabric

Solution:

You might remember that I’ve already discussed how I LOVE to make cases for things. LOVE it. So, my latest endeavor is this little jewelry case with fabric my mom got on a recent teaching trip to Japan. Such beautiful colors, designs and textures. The case can hang from the wall, and then roll up like a burrito. Inside, there’s a hook and pocket for necklaces (so they don't tangle!), and not one but TWO zipper pouches for earrings, rings, etc.

A little shout out to my dear friend Lorien. She makes, among other beautiful works of art, gorgeous jewelry. She made the bridesmaid's necklaces and earrings for my sister's wedding, and countless pairs of earrings, bracelets and necklaces that I (and others worldwide) still wear to this day, and will ALWAYS be found in my travel bag! And if you like the little pink earrings below, you should check out her stuff here, here, oh and here too.

Here's the little Japanese burrito case:

Fancy-Patches

Machine appliqué in action.

Las-Joyas-Collage

Rubi was sort of interested in what I was doing. Zippy

Hanging out:Jewelry-Case-1Jewelry-Case-2

The other zipper pouch is hiding behind the first one!

Jewelry-Case-3

Roll her on up!Jewelry-Case-4Jewelry-Case-5Jewelry-Case-6Now, if only I could use this for an actual TRIP TO JAPAN!

H is for Hands

What’s the first thing you think of when you think 4th of July?

No, not fireworks...

Not grilling...

It’s natural beauty products, duh! On the 4th of July here in Michigan, we had a discussion about this very topic. My mom and aunt were talking about how my grandma used to go to this place called Merle Norman because (pre-Clinique) they had the only hypoallergenic makeup around. Even nowadays, the search for makeup that doesn’t irritate our skin still endures, and we spend a lot of time talking about chemicals in what we use.

Patriotic-Hand-Cream

Not to get on a (natural, chemical-free) soap box or anything, but I was doing some fancy “internet research” about the topic, and I couldn’t get the image of us essentially rubbing lighter fluid all over our faces, arms and legs. Using natural products makes a lot of sense to me, really. When I stopped using a face cream with chemicals, I no longer felt a burning, tingling sensation every time I put it on. Now, I don’t know a lot about biology or chemistry, but that has got to be a good thing.

ANYWAY.

Back to the fun part! I have been longing to try this Creativebug homemade apothecary tutorial by Amy Karol from Angry Chicken for months. And in the intro to the lip balm section, Amy speaks my soap box-y mind. She says, “You use it next to your mouth, so you want to know what’s in it... because you’re kind of eating it.”

The ingredients are so simple, and so delicious: Cocoa butter, shea butter, sunflower oil, vitamin E, and an essential oil for scent. I used tangerine, and a bit of lavender for some of the hand creams. The mixture of the scents of shea butter, cocoa butter and tangerine is quite delightful! And, it is SUPER easy to buy empty lip balm tubes (I did not know that a week ago) and violà... Homemade lip balm.

So please enjoy the making of his "handy" little cream!

Tutorial-Edible-Lip-BalmMake-Lip-Balm--ButteryLabel-Lip-BalmTangerine-Lip-BalmGettin-Lippy-Lip-Balm